NOTES
Invoice Template is the invoice / purchase order layout of your company, you can design this layout to match your business's theme and color. This invoice template can be designed once and re-use it for all invoice / purchase order issued by your business.
Step by step tutorial to create and edit an Invoice Template
1. After you logged in to your account in Accent system, proceed to Invoice Templates at the side menu.
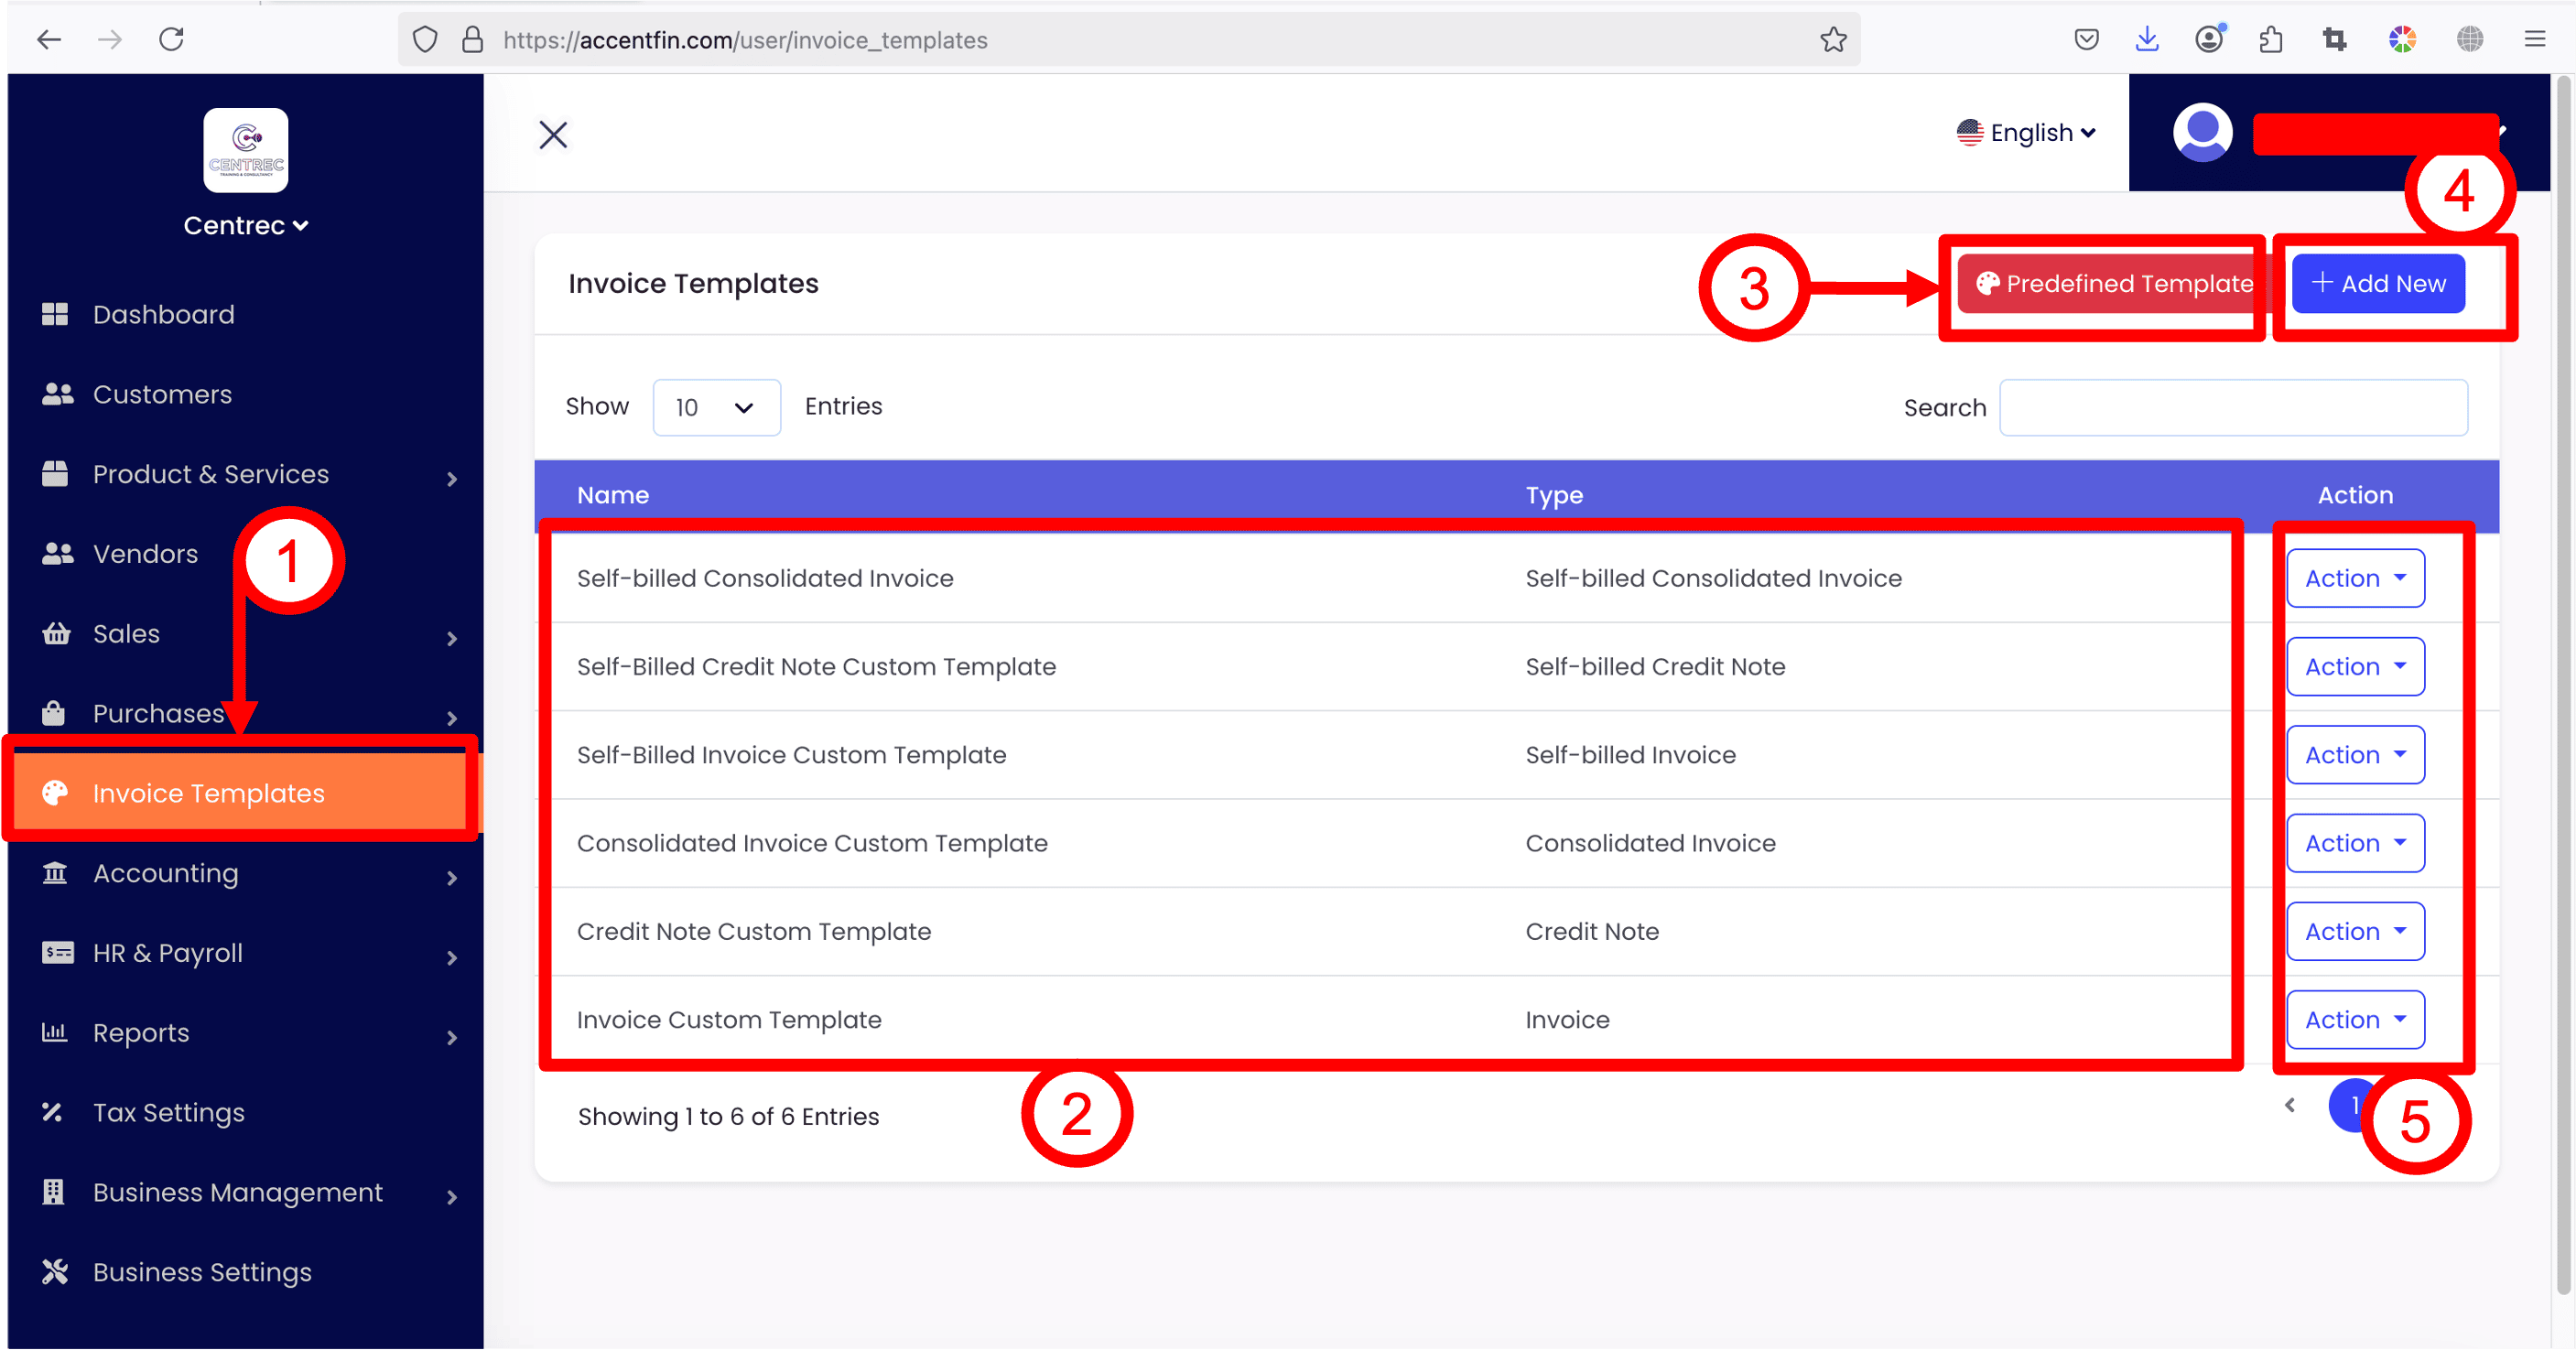
2. Here you will see all the invoice templates you have created previously.
3. If you have no idea how to start to create an invoice template, you may proceed to Predefined Template, here contains a few samples for you to copy.
4. If you wish to design your own custom invoice template, click + Add New.
5. If you wish to edit existing invoice template, click on the Action dropdown button at the right side of the invoice template record, and click Edit.

6. As mentioned in No.3, if you have no idea how to design an invoice template, you may click on Predefined Template button and you will reach this page. Here lists the available Invoice Template samples that you can copy directly. Just click on the Copy button at the right side of your desired template sample to duplicate it as your own invoice template.
7. If you wish to go back to your own list of Invoice Templates, click on My Templates.
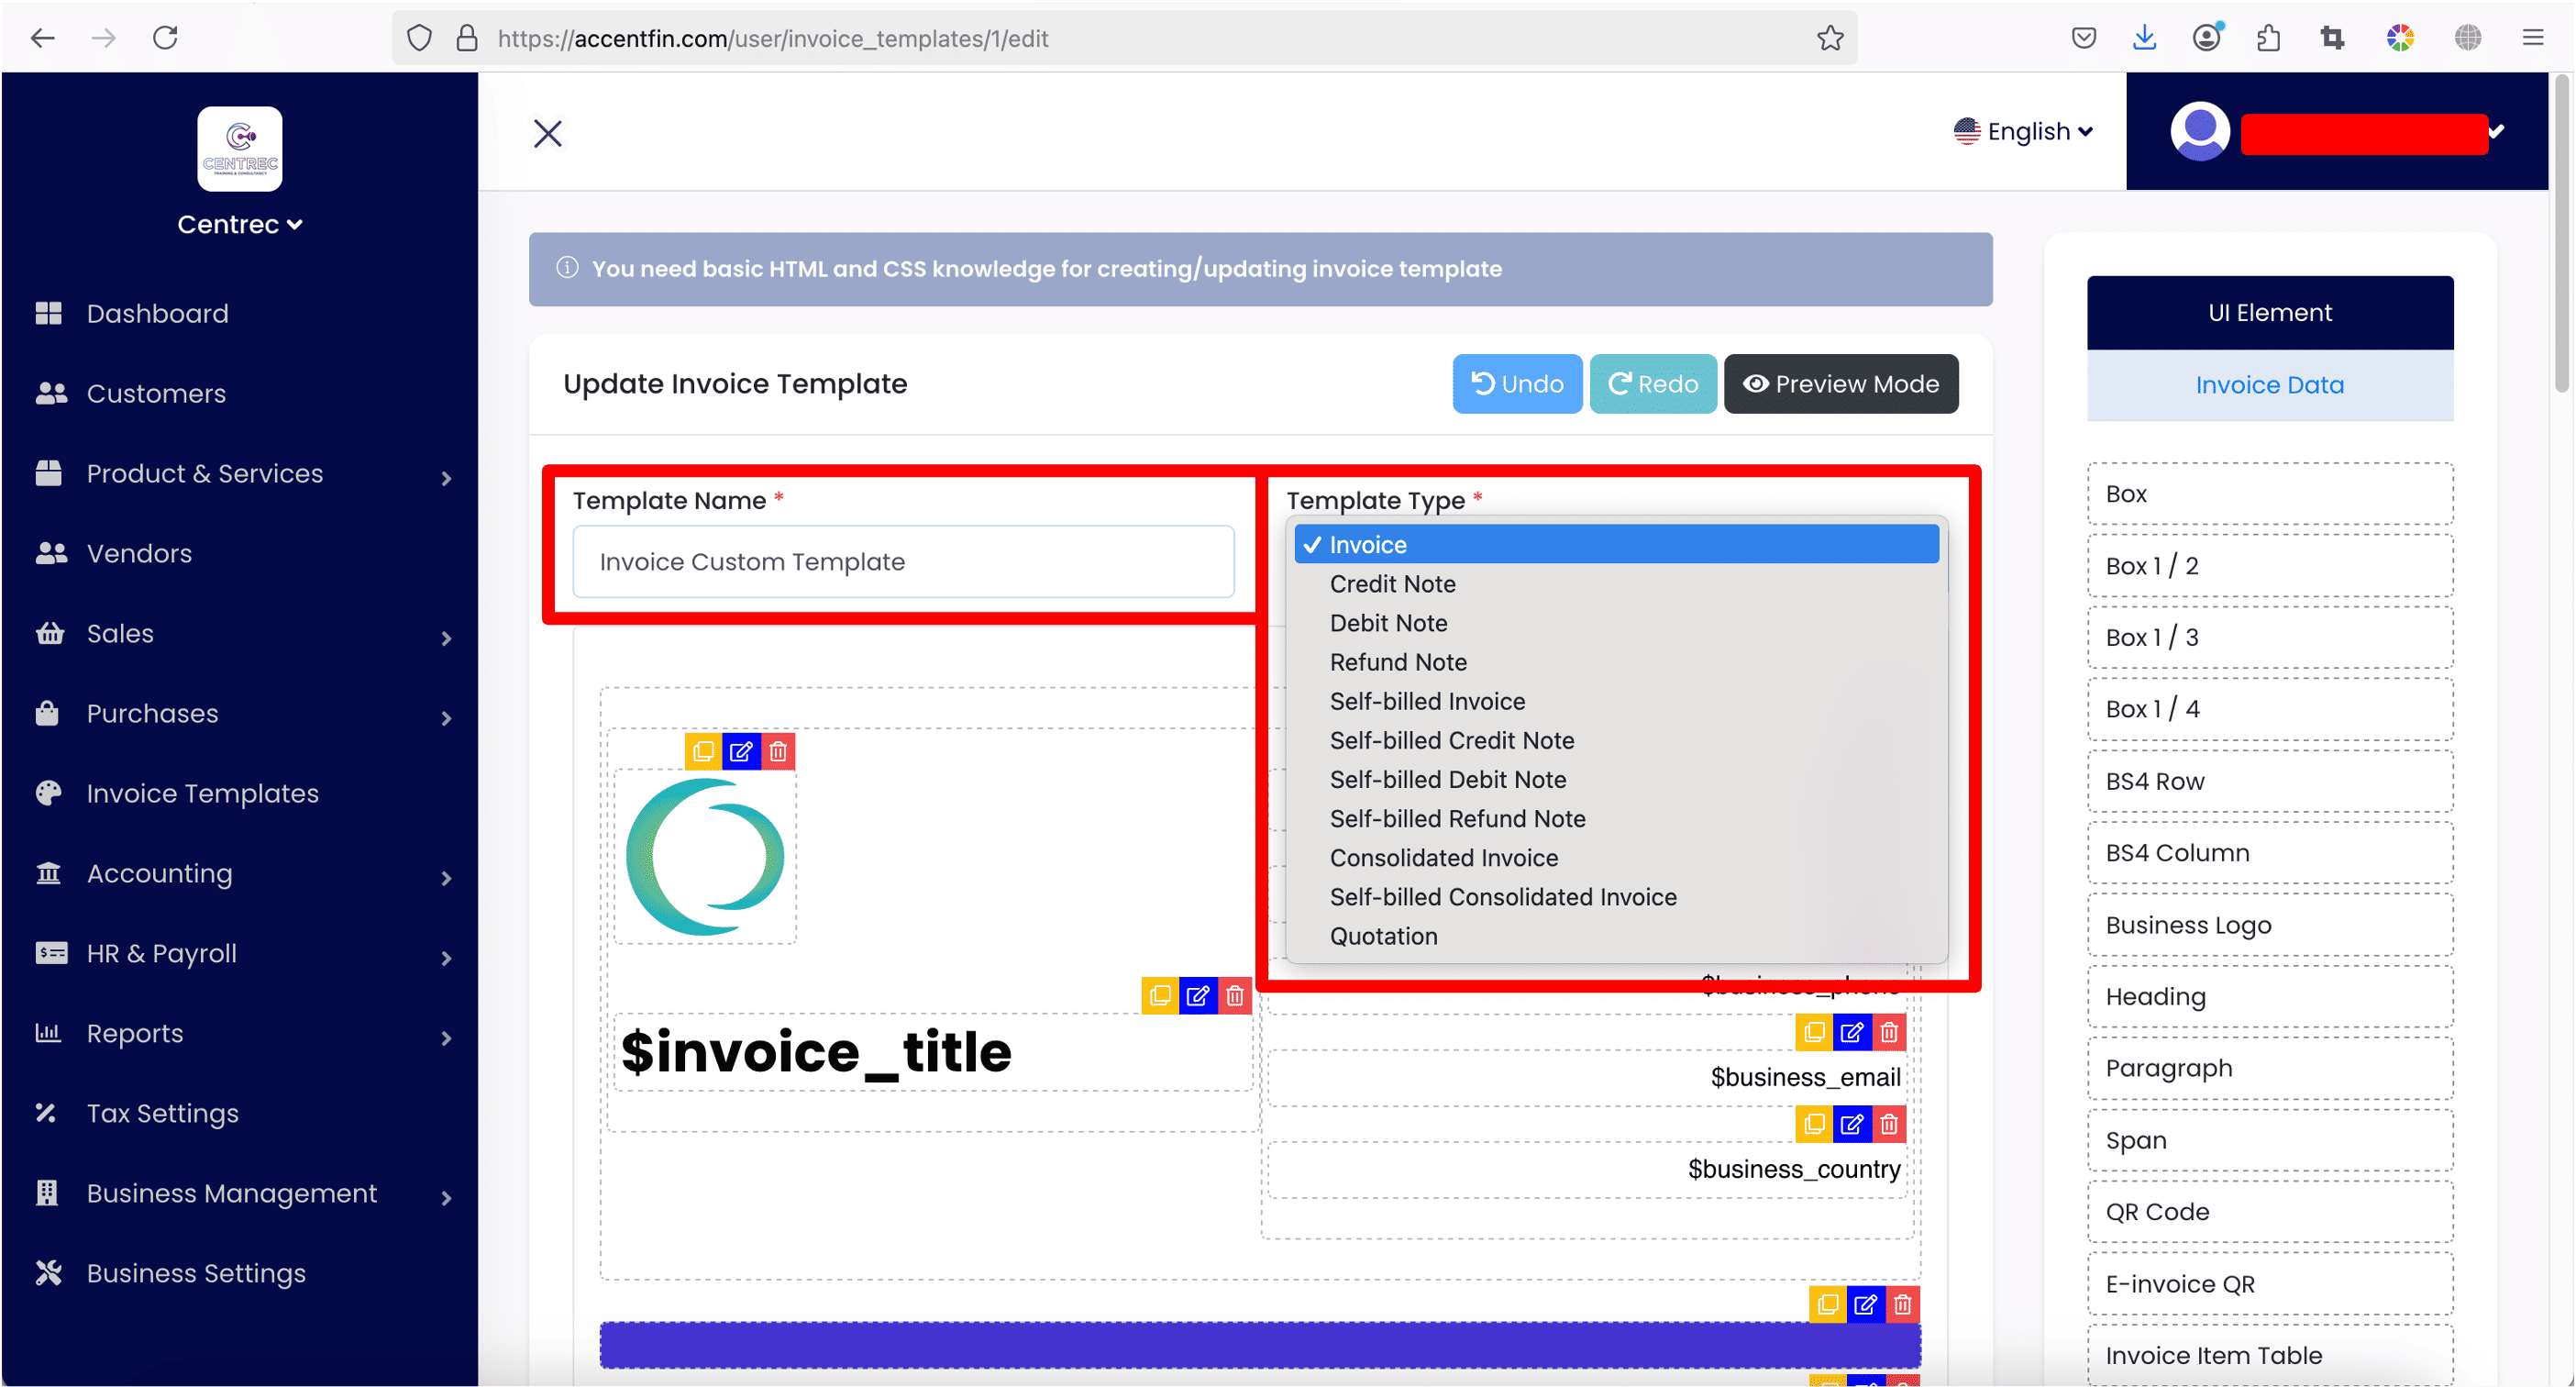
8. In the Invoice Template editing screen, there are two fields you must take note on.
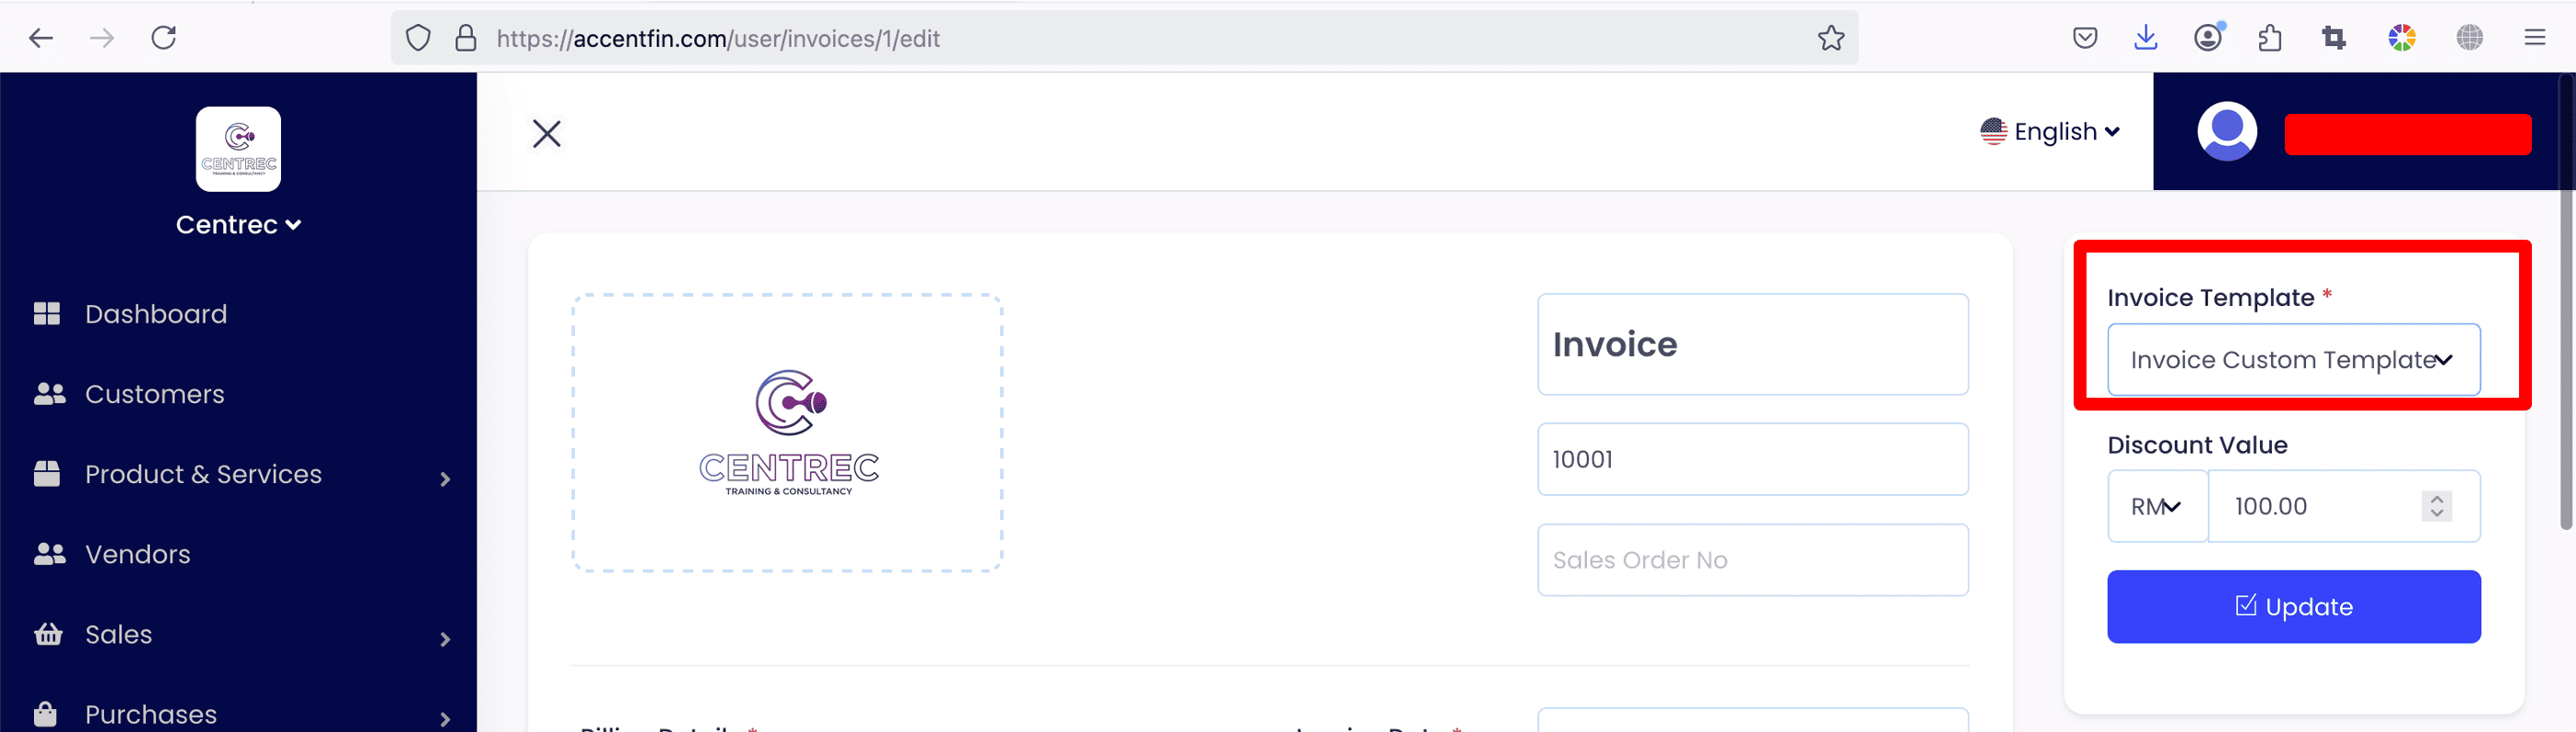
First is the Template Name, you can give any names to your Invoice Template, but please make it unique and easy to understand, as you will need to select the correct Invoice Template when you are issueing an invoice or purchase order.
Secondly, select the Template Type, this template type is important in linking your invoice template to the respective document type, especially when you are trying to issue an e-invoice to MyInvois Portal, this template type will decide the type of e-invoice document you are going to issue. You may refer to this guideline for more information on e-invoice document types: link.
For example, if you select Invoice as the Template Type of this invoice template, next, when you issue invoice, you select this particular invoice template that you have created (which is Invoice Custom Template), this means that the invoice that you have issued is under document type: Invoice, and the layout of the invoice that you have issued will follow exactly like the invoice template that you have designed.
Vice versa, if you select Credit Note as the Template Type instead of Invoice for the invoice template, this means that the invoice document you issued will be a Credit Note, and NOT an Invoice.
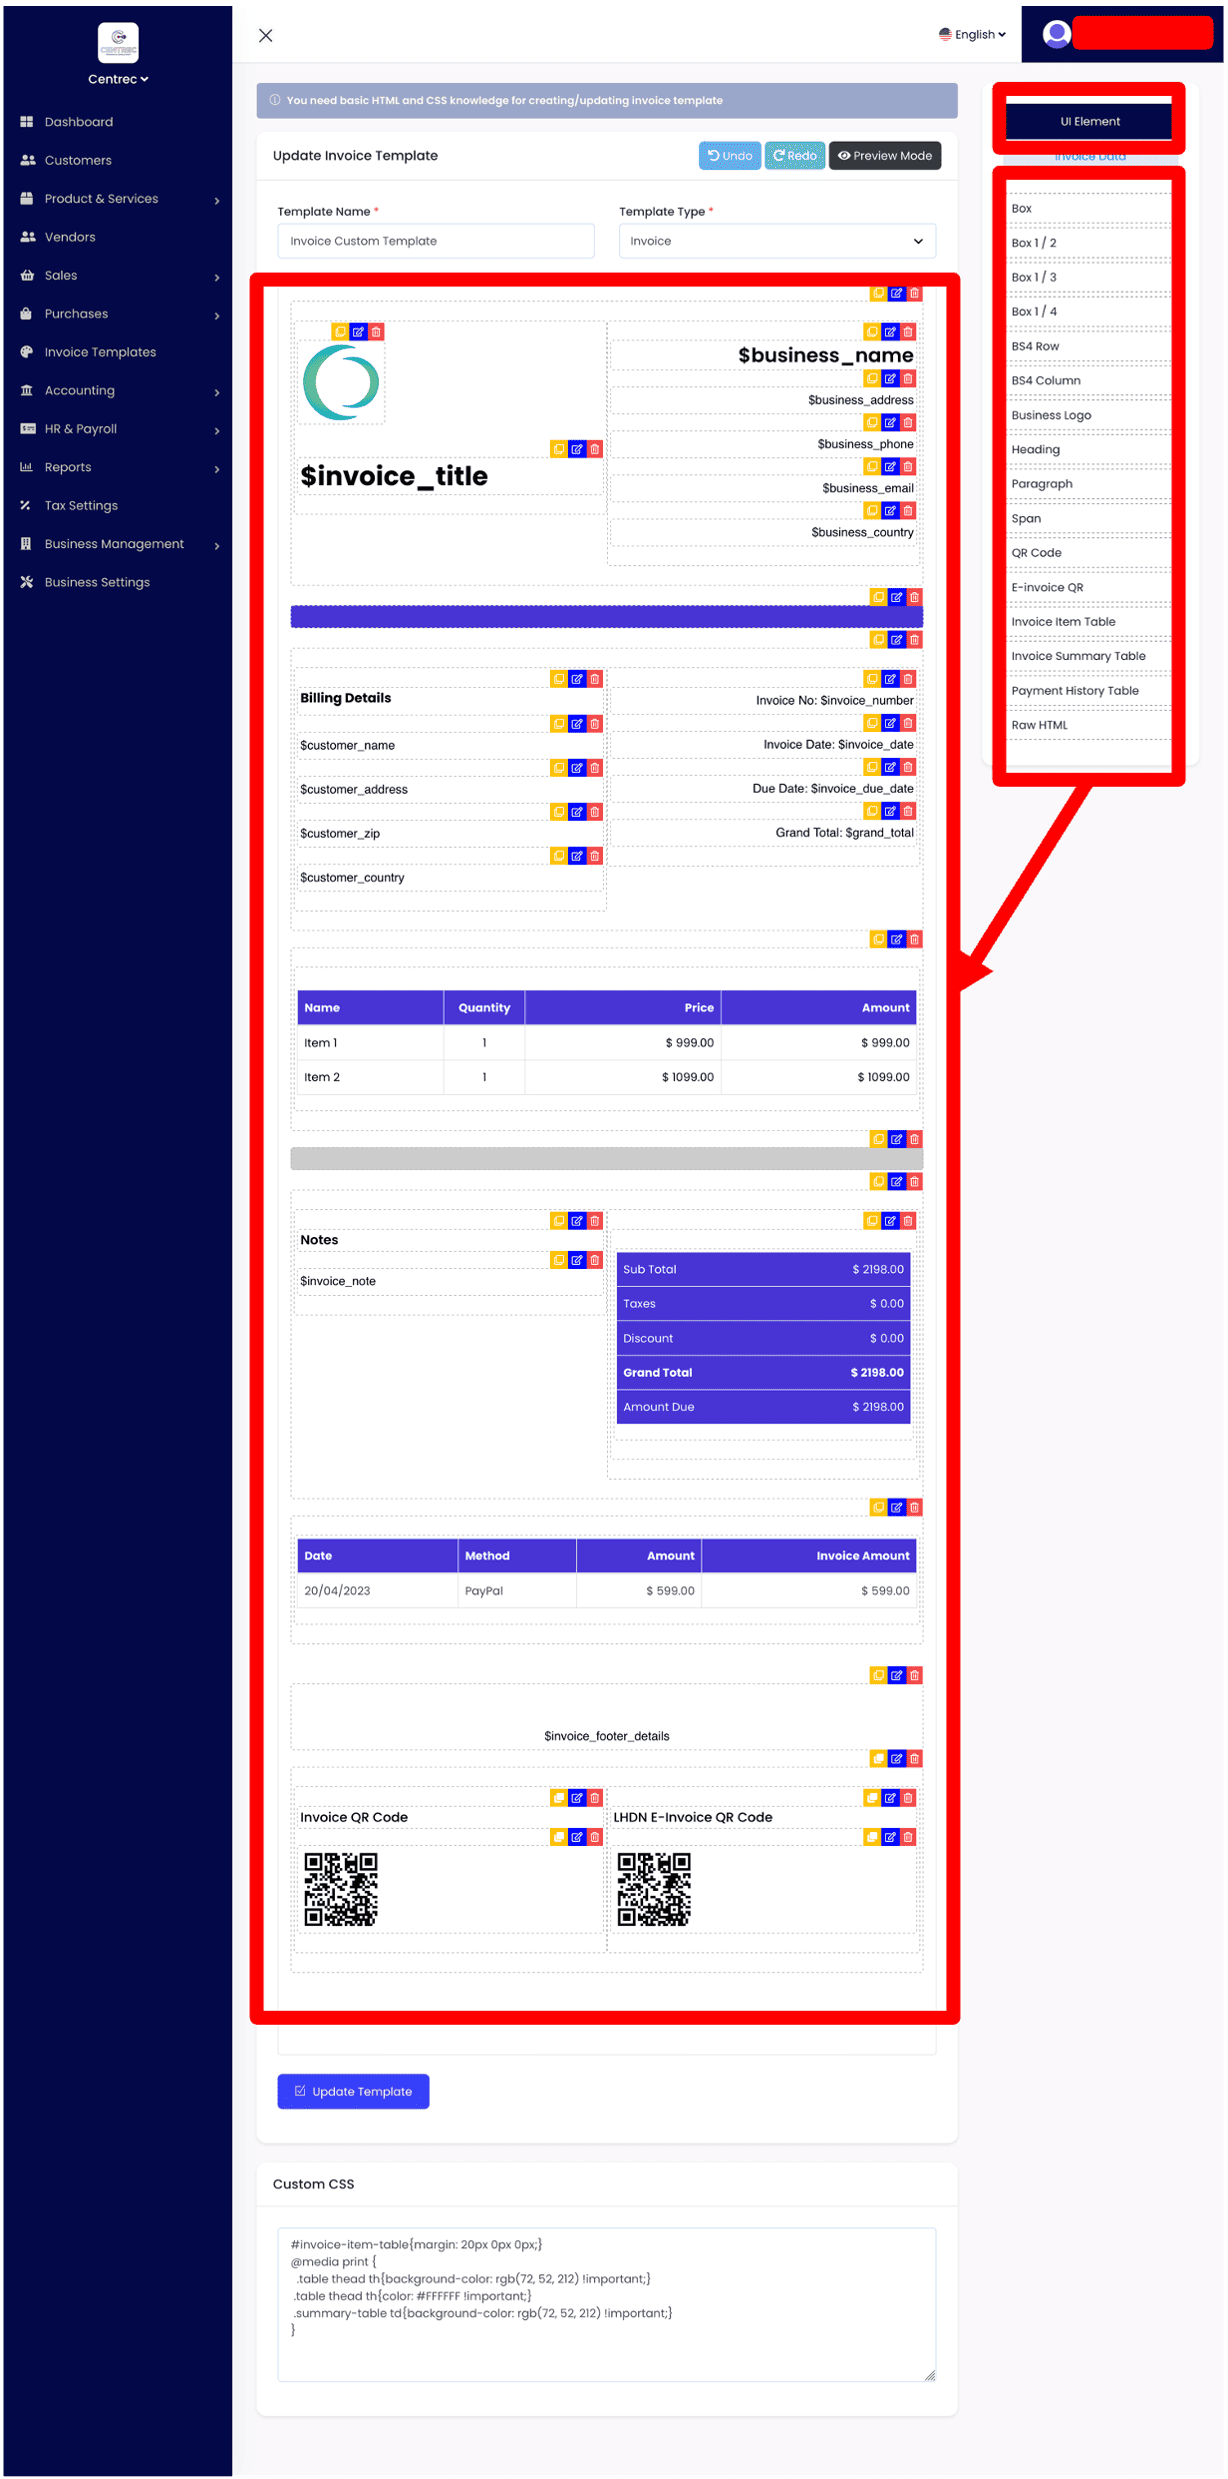
9. In the Invoice Template editing screen, you can freely design how your invoice layout should look like. To do this, you can click on UI Element at the top right corner, then you will see a list of available elements such as Box, Box 1/2 and so on. You may drag and drop any of the elements here into your template layout and edit them accordingly.
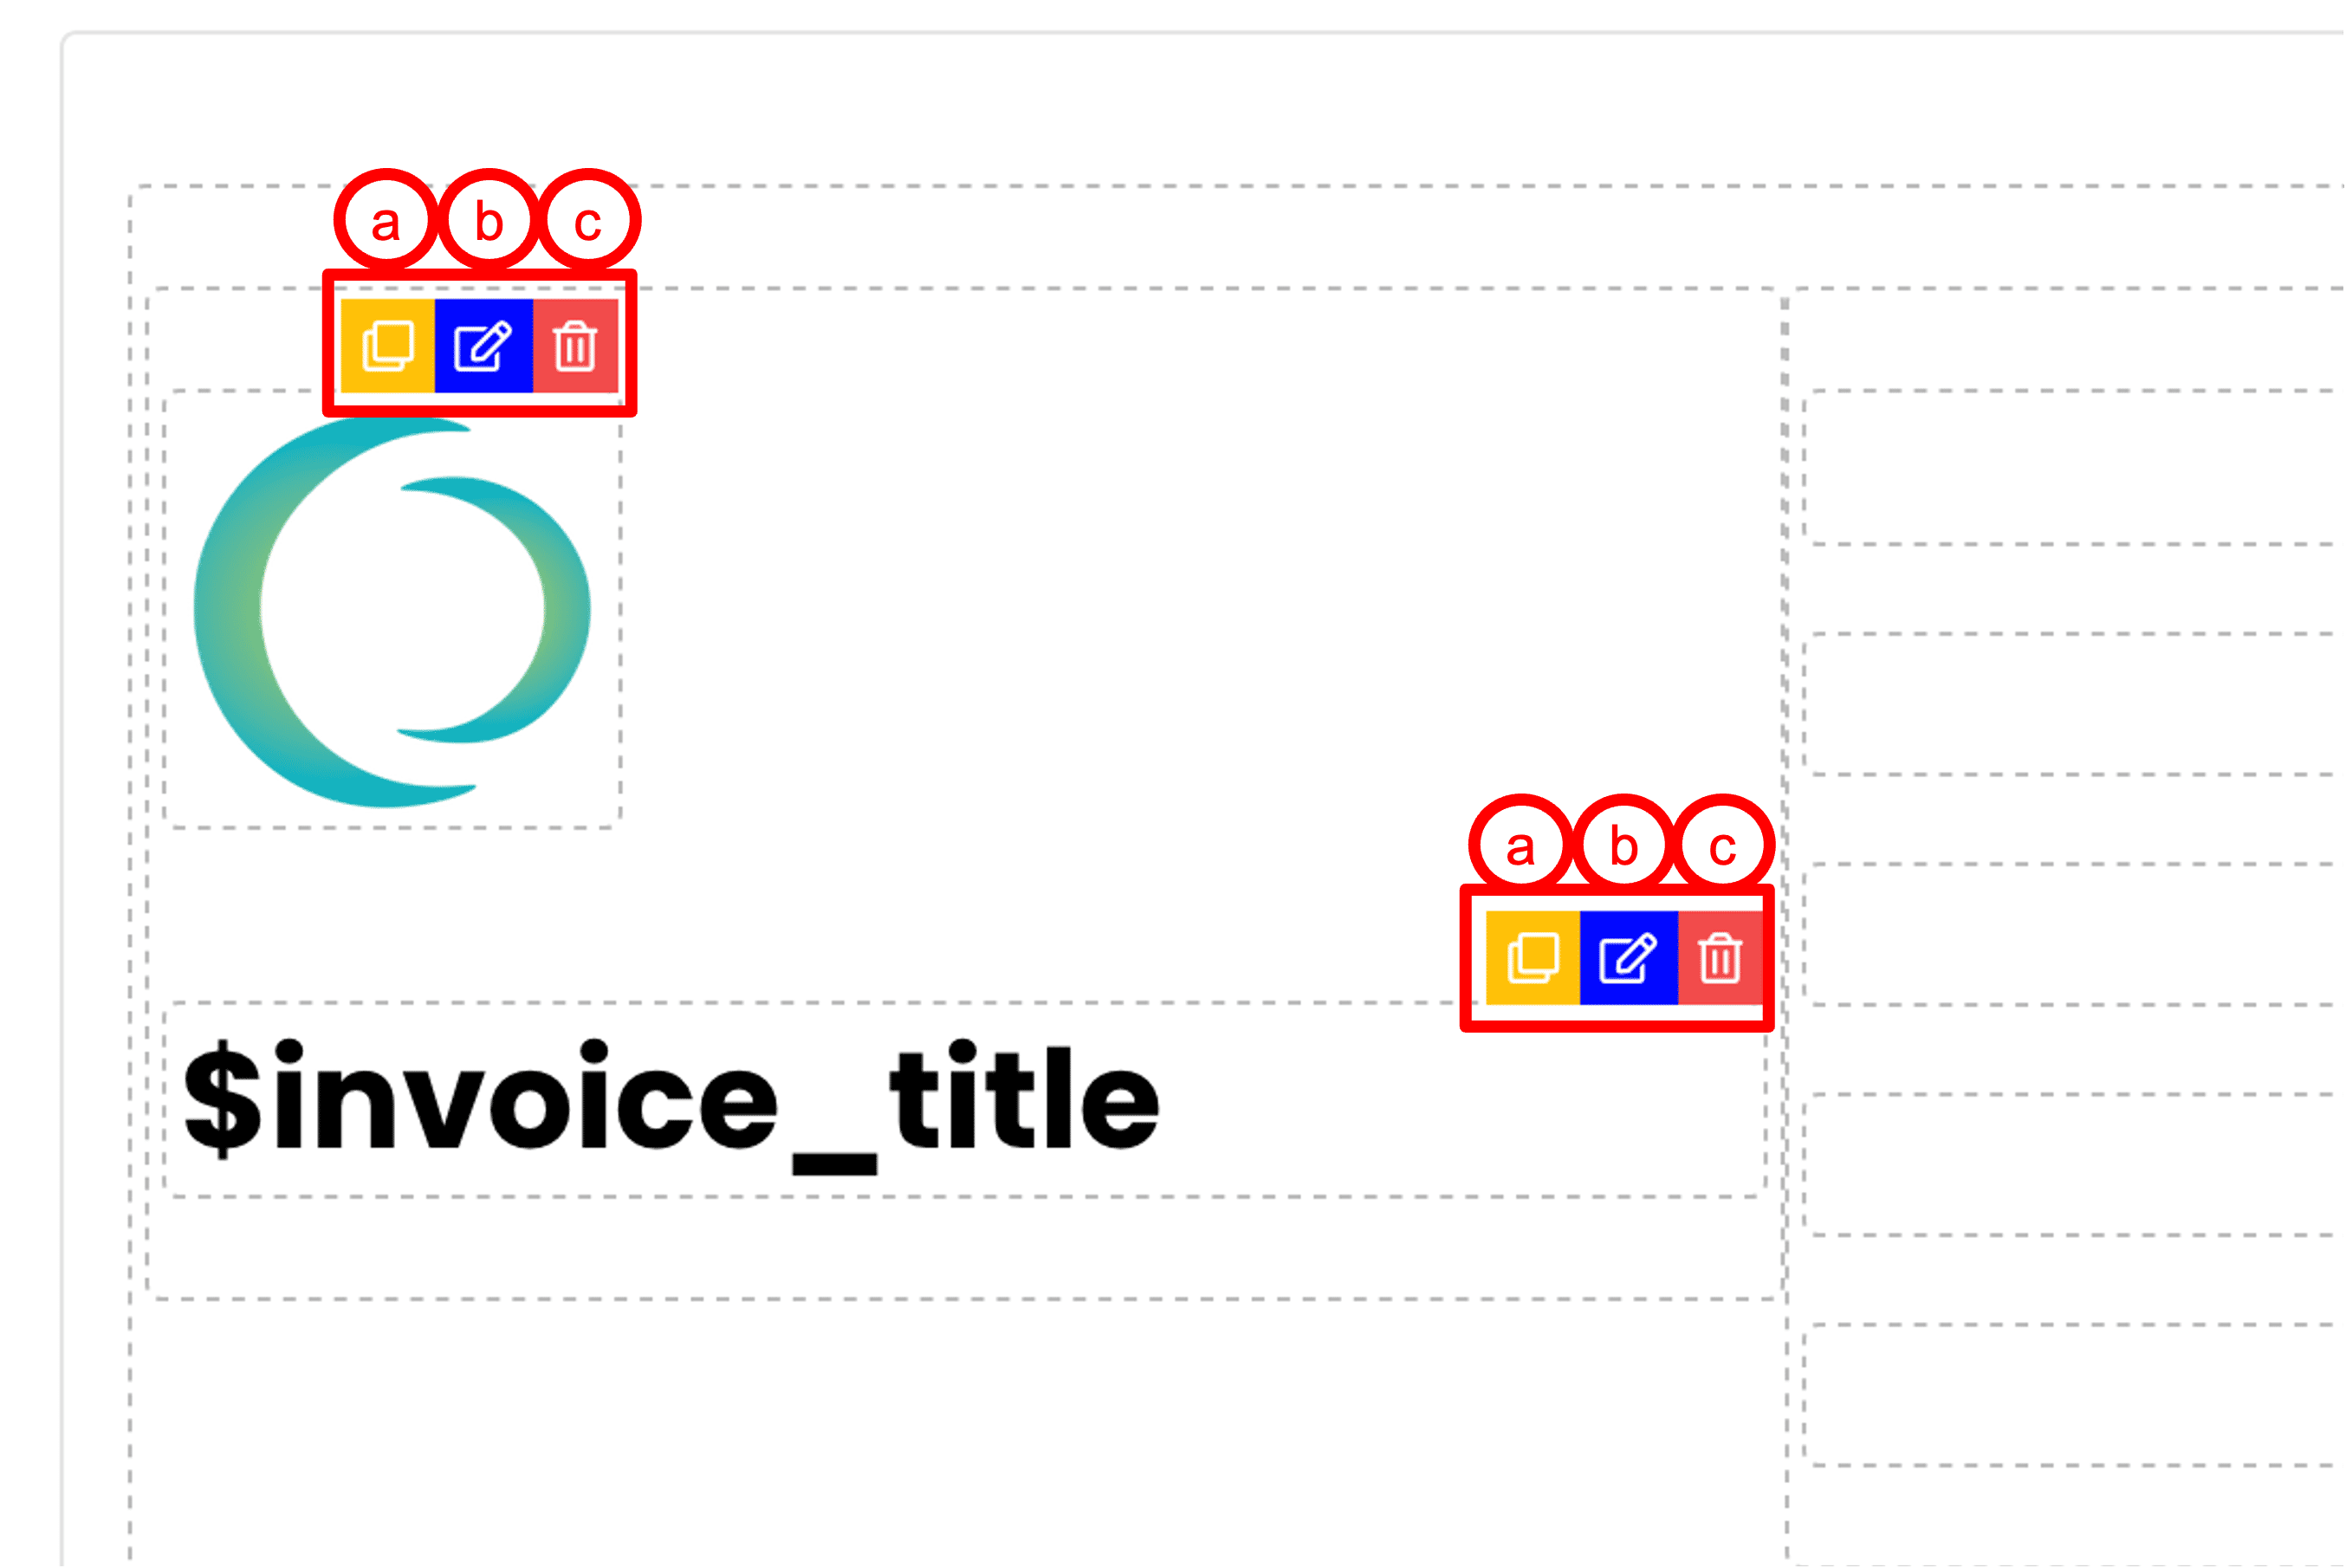
10. There will be 3 buttons located at the top right of each element you added into the layout.
a. Duplicate button: Click to duplicate the element.
b. Edit button: Click to edit the details and outlook of the element.
c. Delete button: Click to remove the element from your layout.
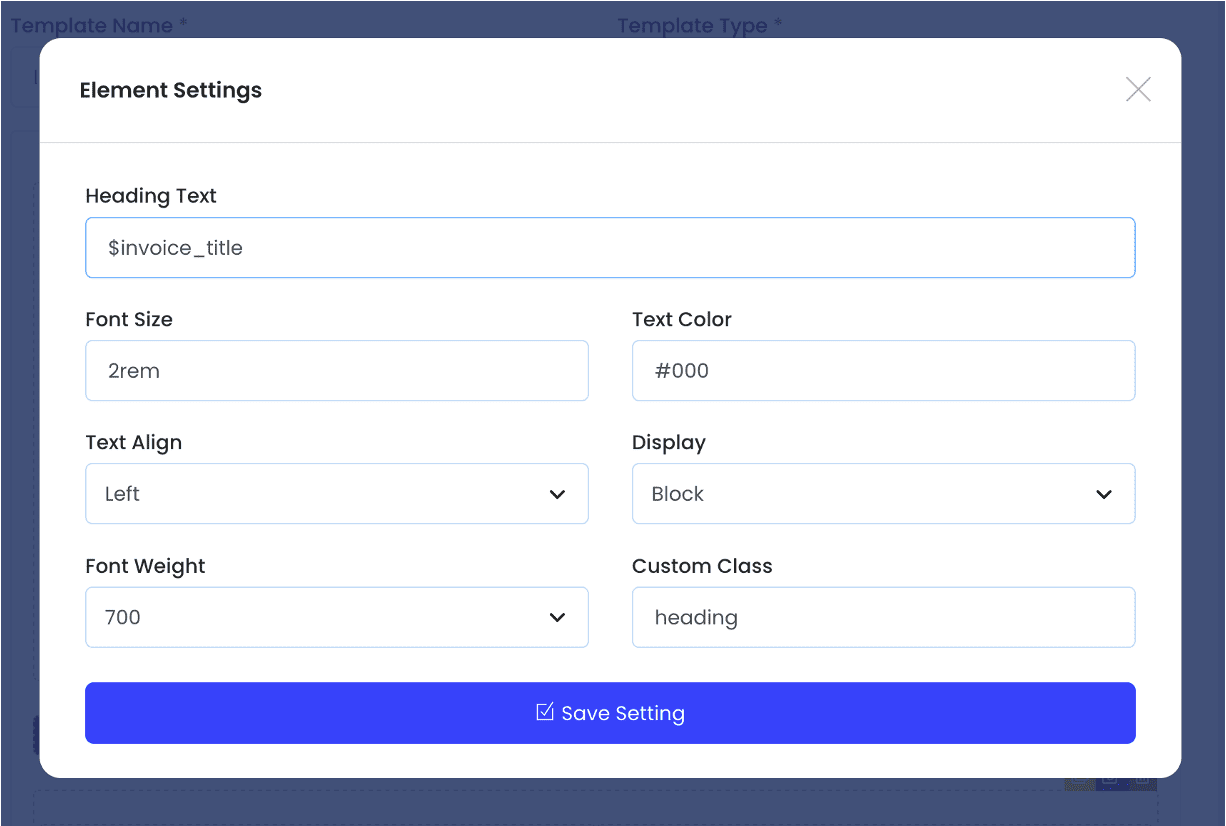
11. When you click on the blue color Edit button of the element, a modal will popup where you can adjust the details and outlook of your element. For example, the size of wordings of the element, or the colors of wordings of the element.
12. Regarding the content of the element (what details should appear inside the element), you may click on the Invoice Data button on the top right corner, then you will be able to see a list of available data that you can put inside an element (a).
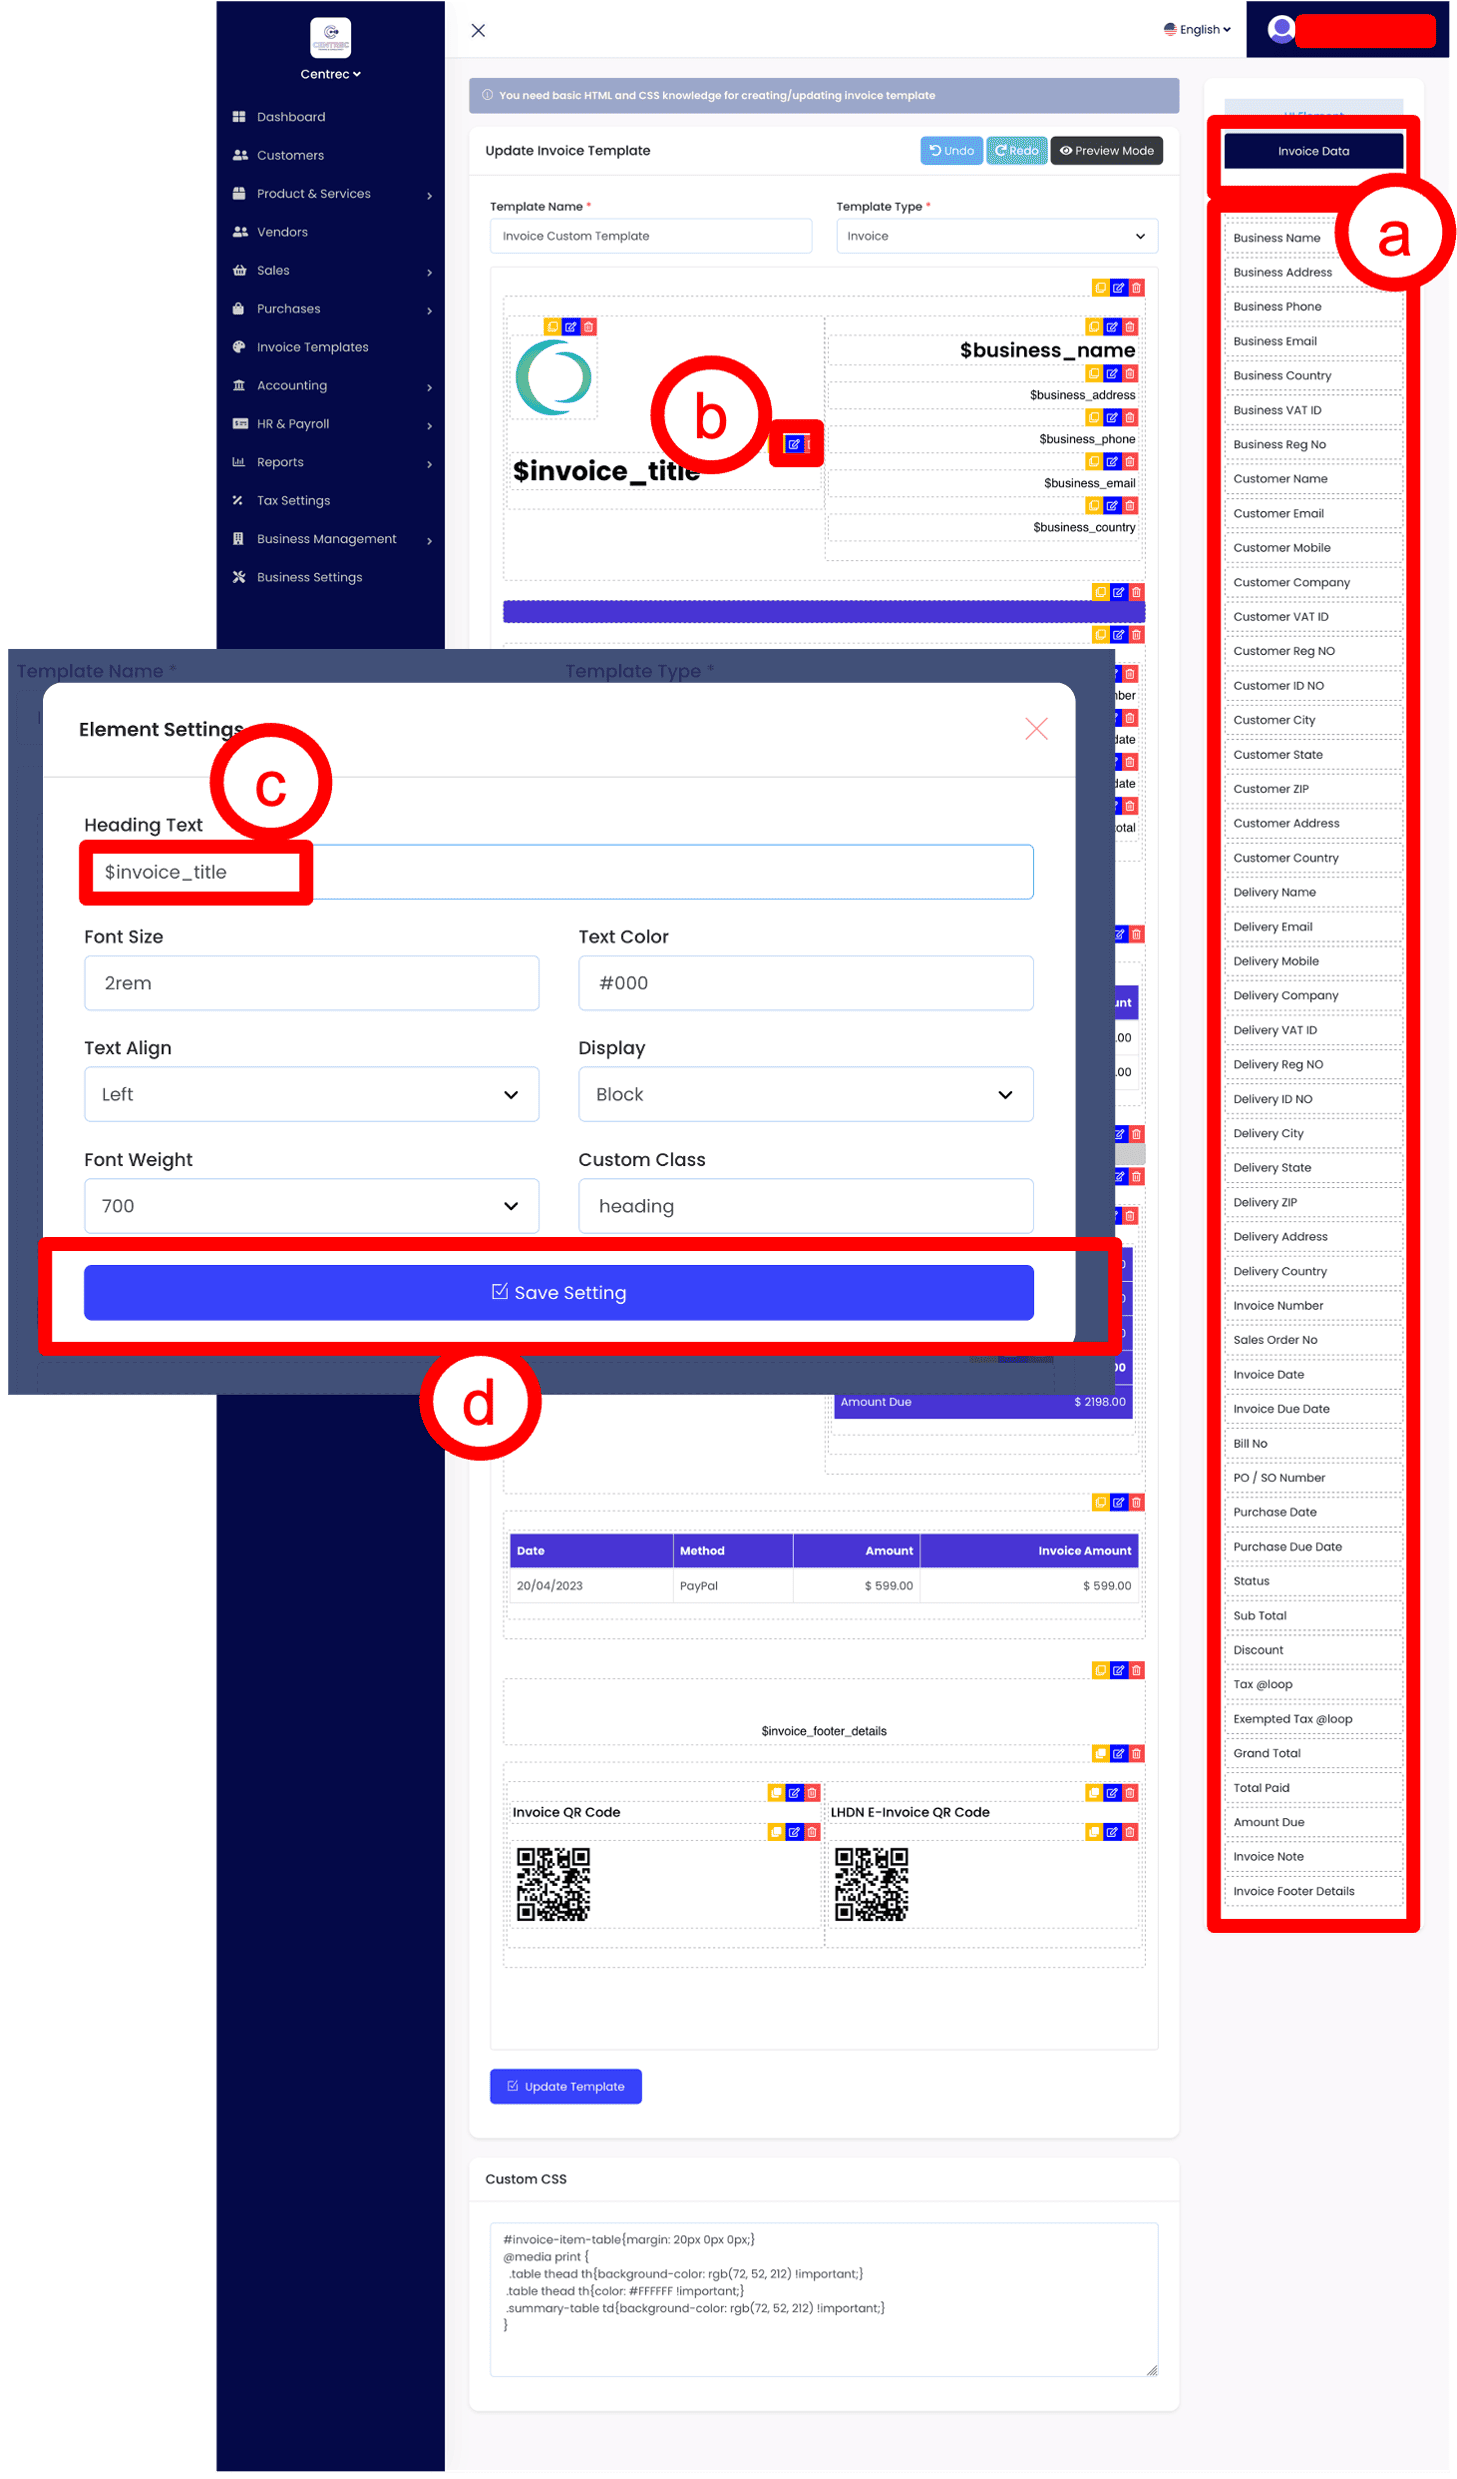
13. Click on the desired Invoice data to copy it, then (b) click on the blue color Edit button of the element you wish to edit. Once the element settings modal appear, (c) proceed to the content field (in this case: Heading Text), and paste the Invoice data that you have copied just now. Lastly, (d) click Save Setting to save your element settings.
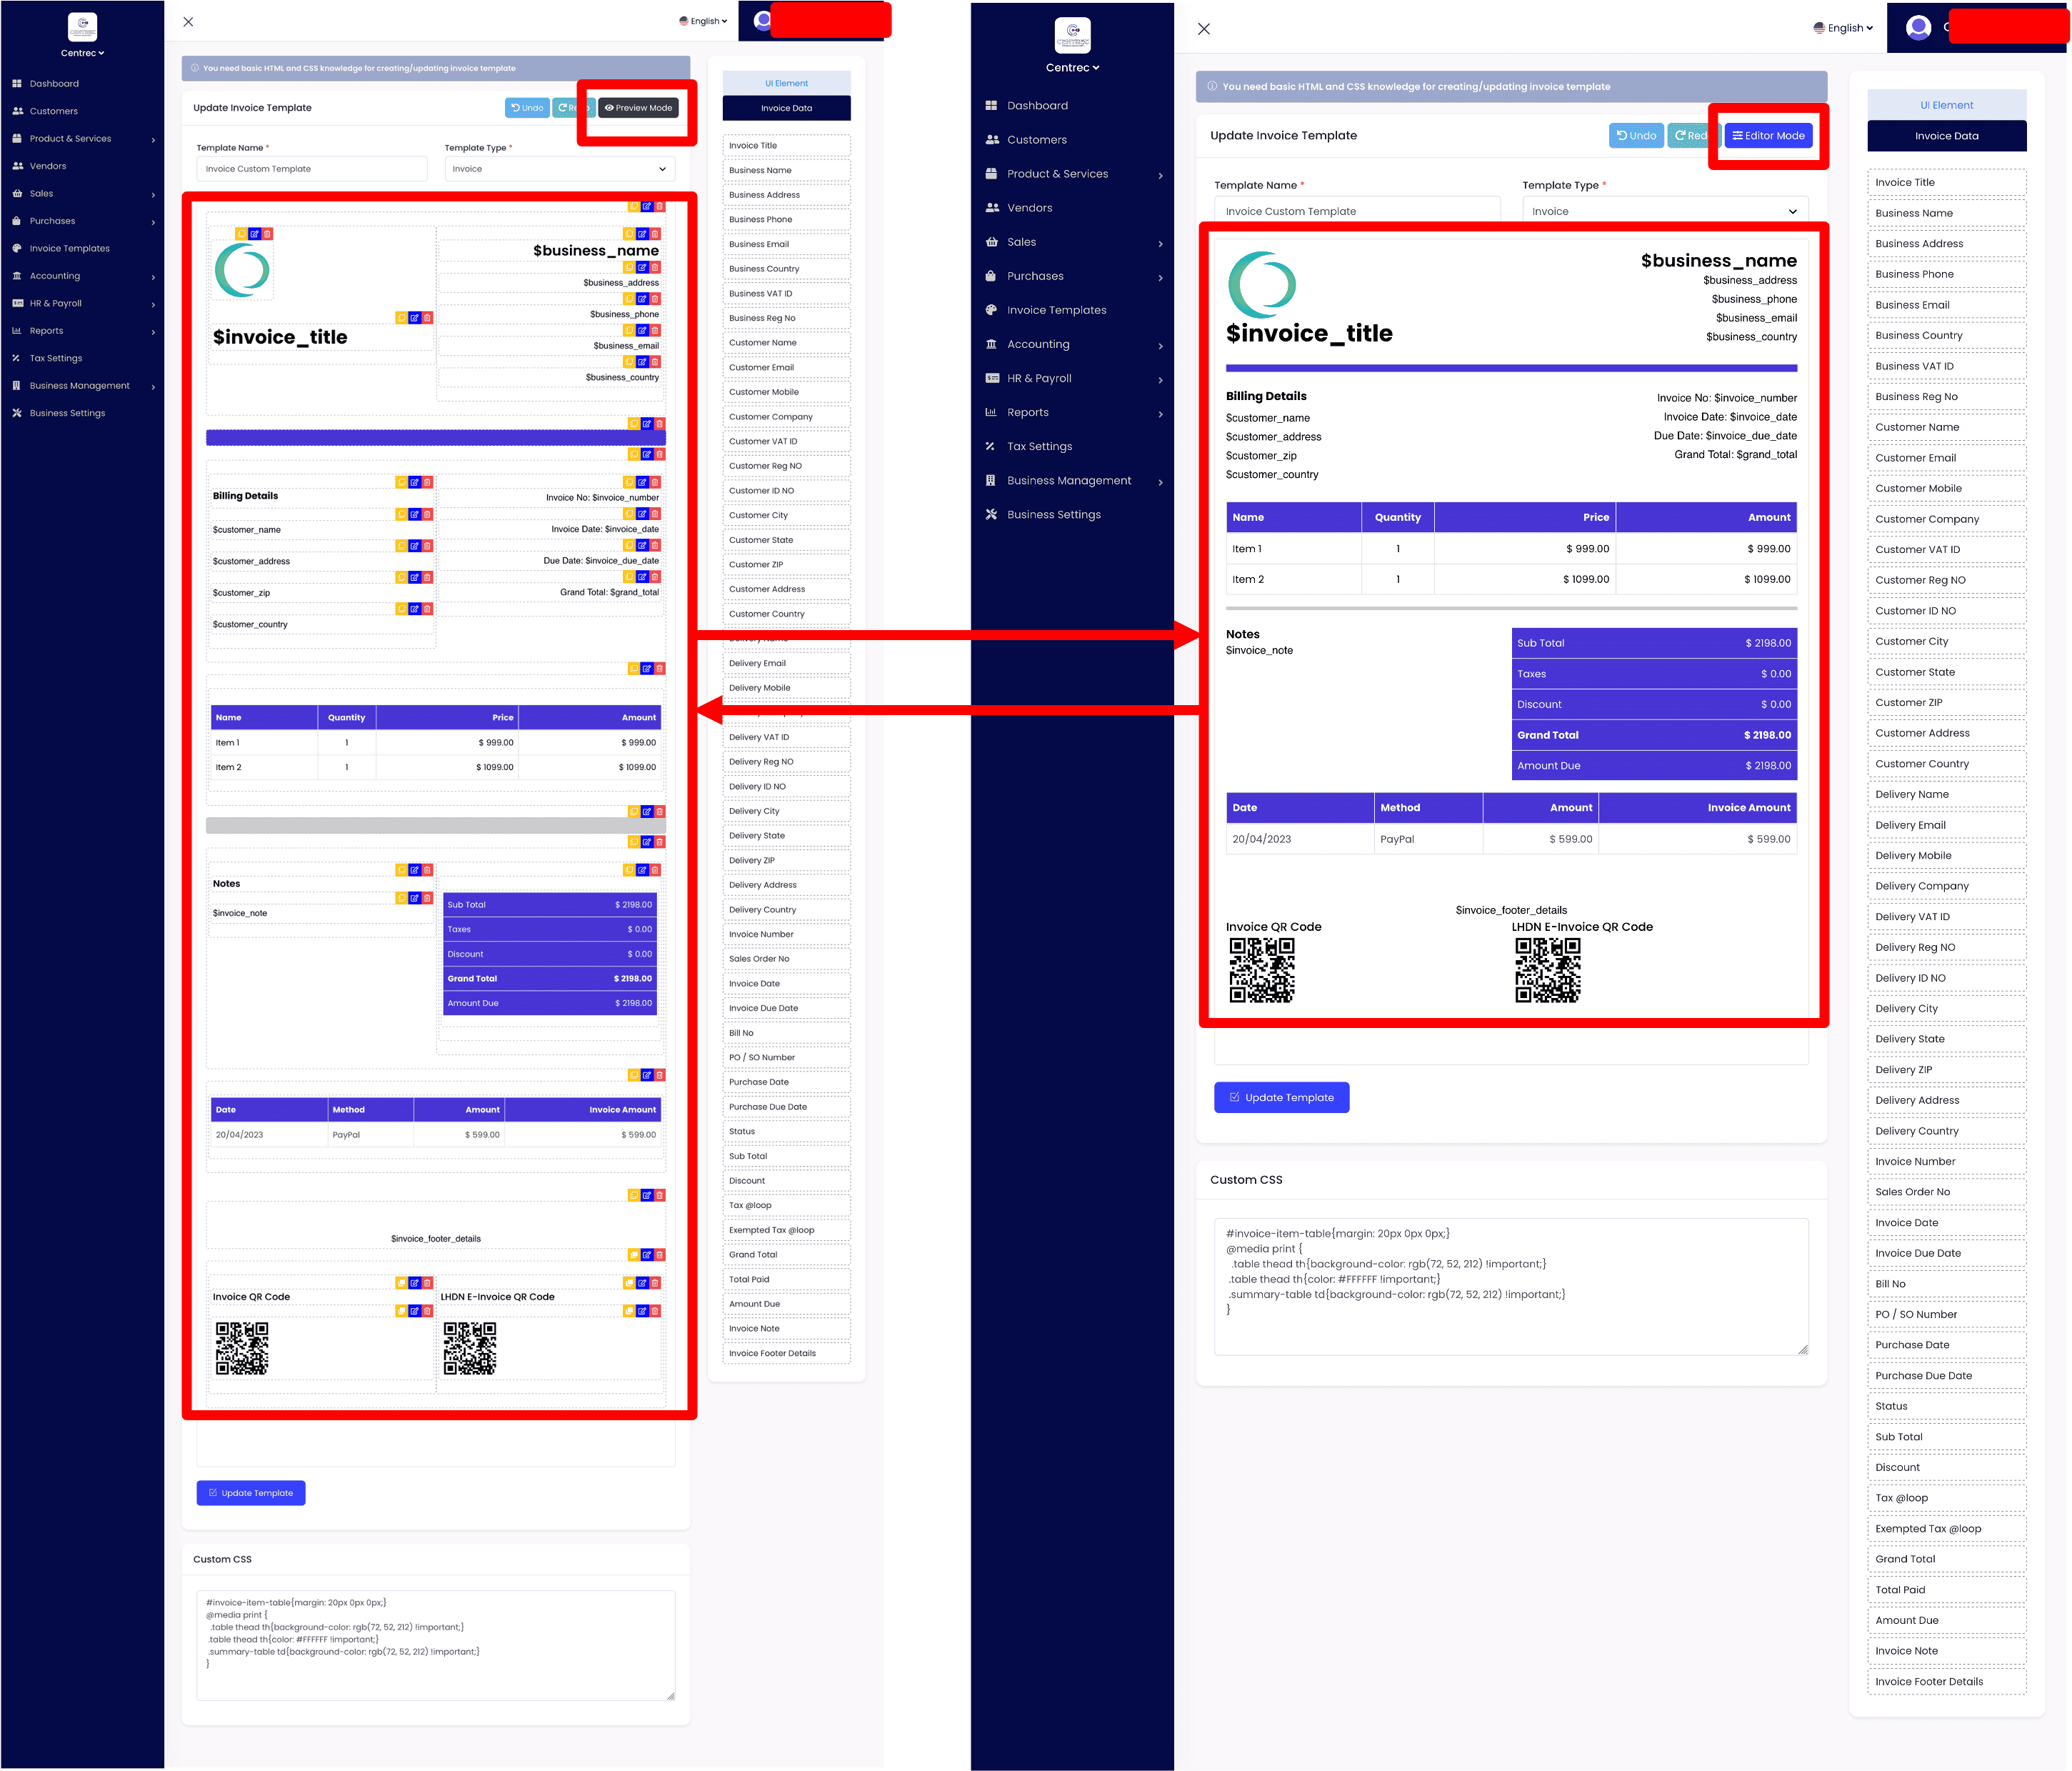
14. To preview your invoice template, click on the Preview Mode button. If wish to continue editing your invoice template, click on the Editor Mode button.
15. Don't forget to click Update Template to save all your changes.
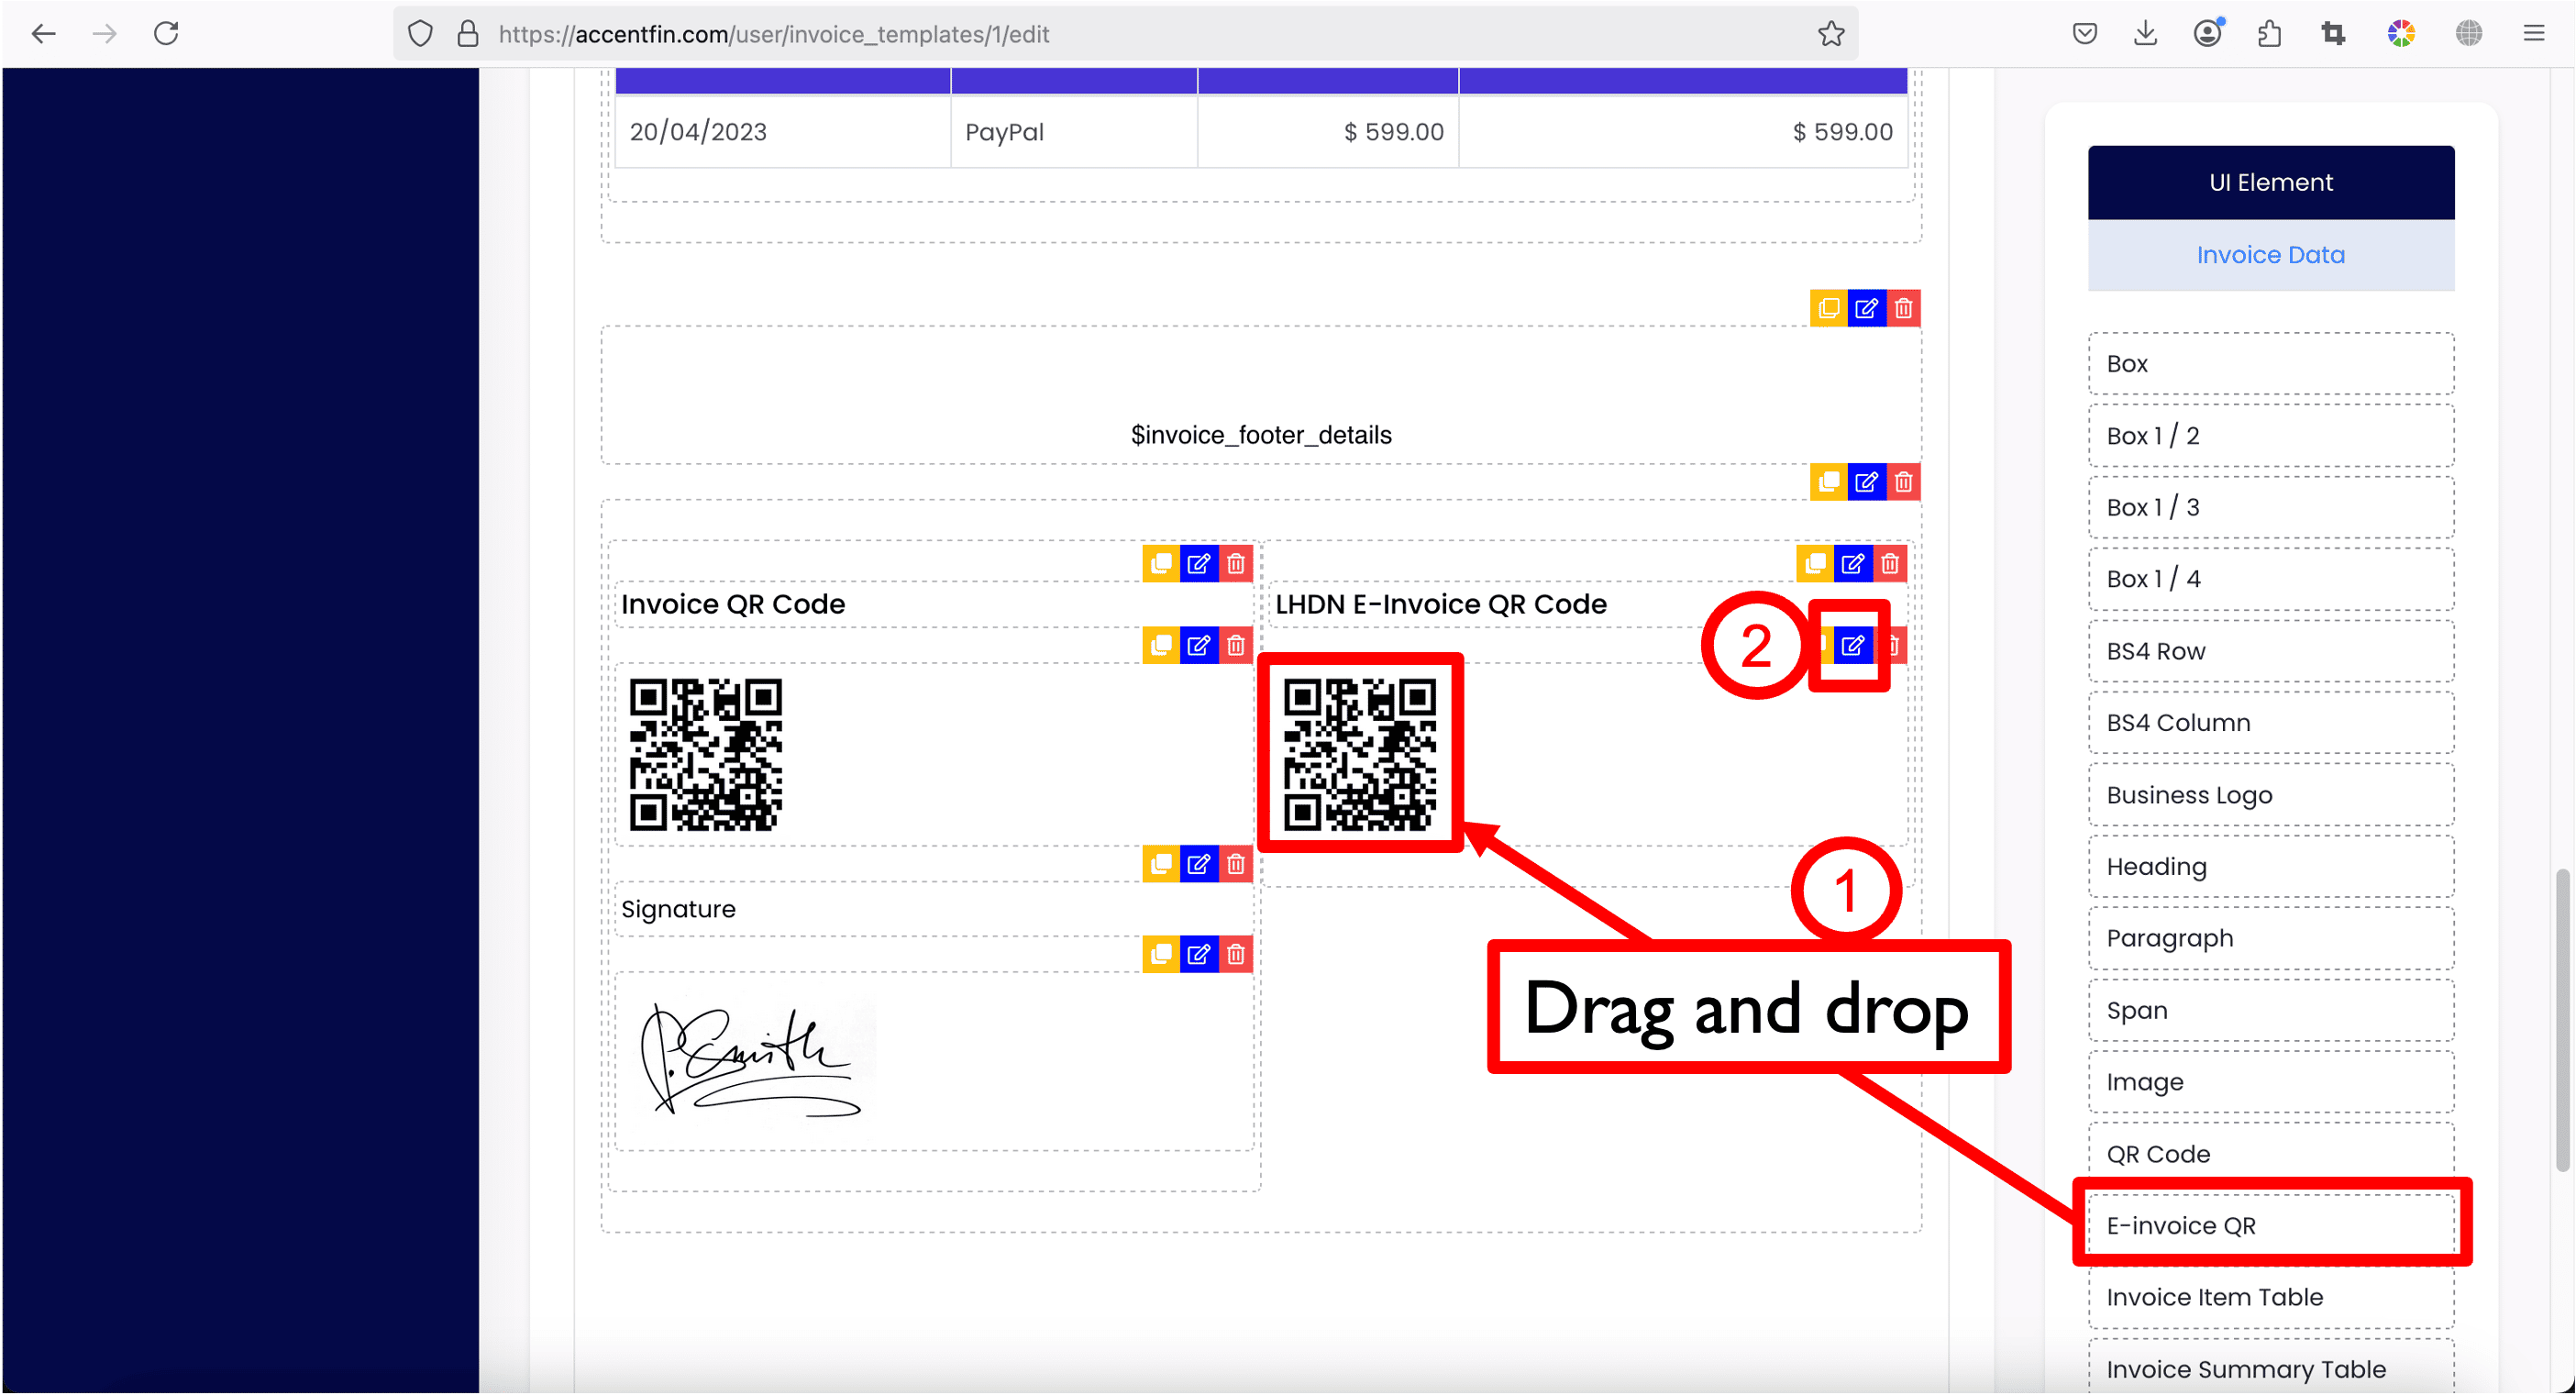
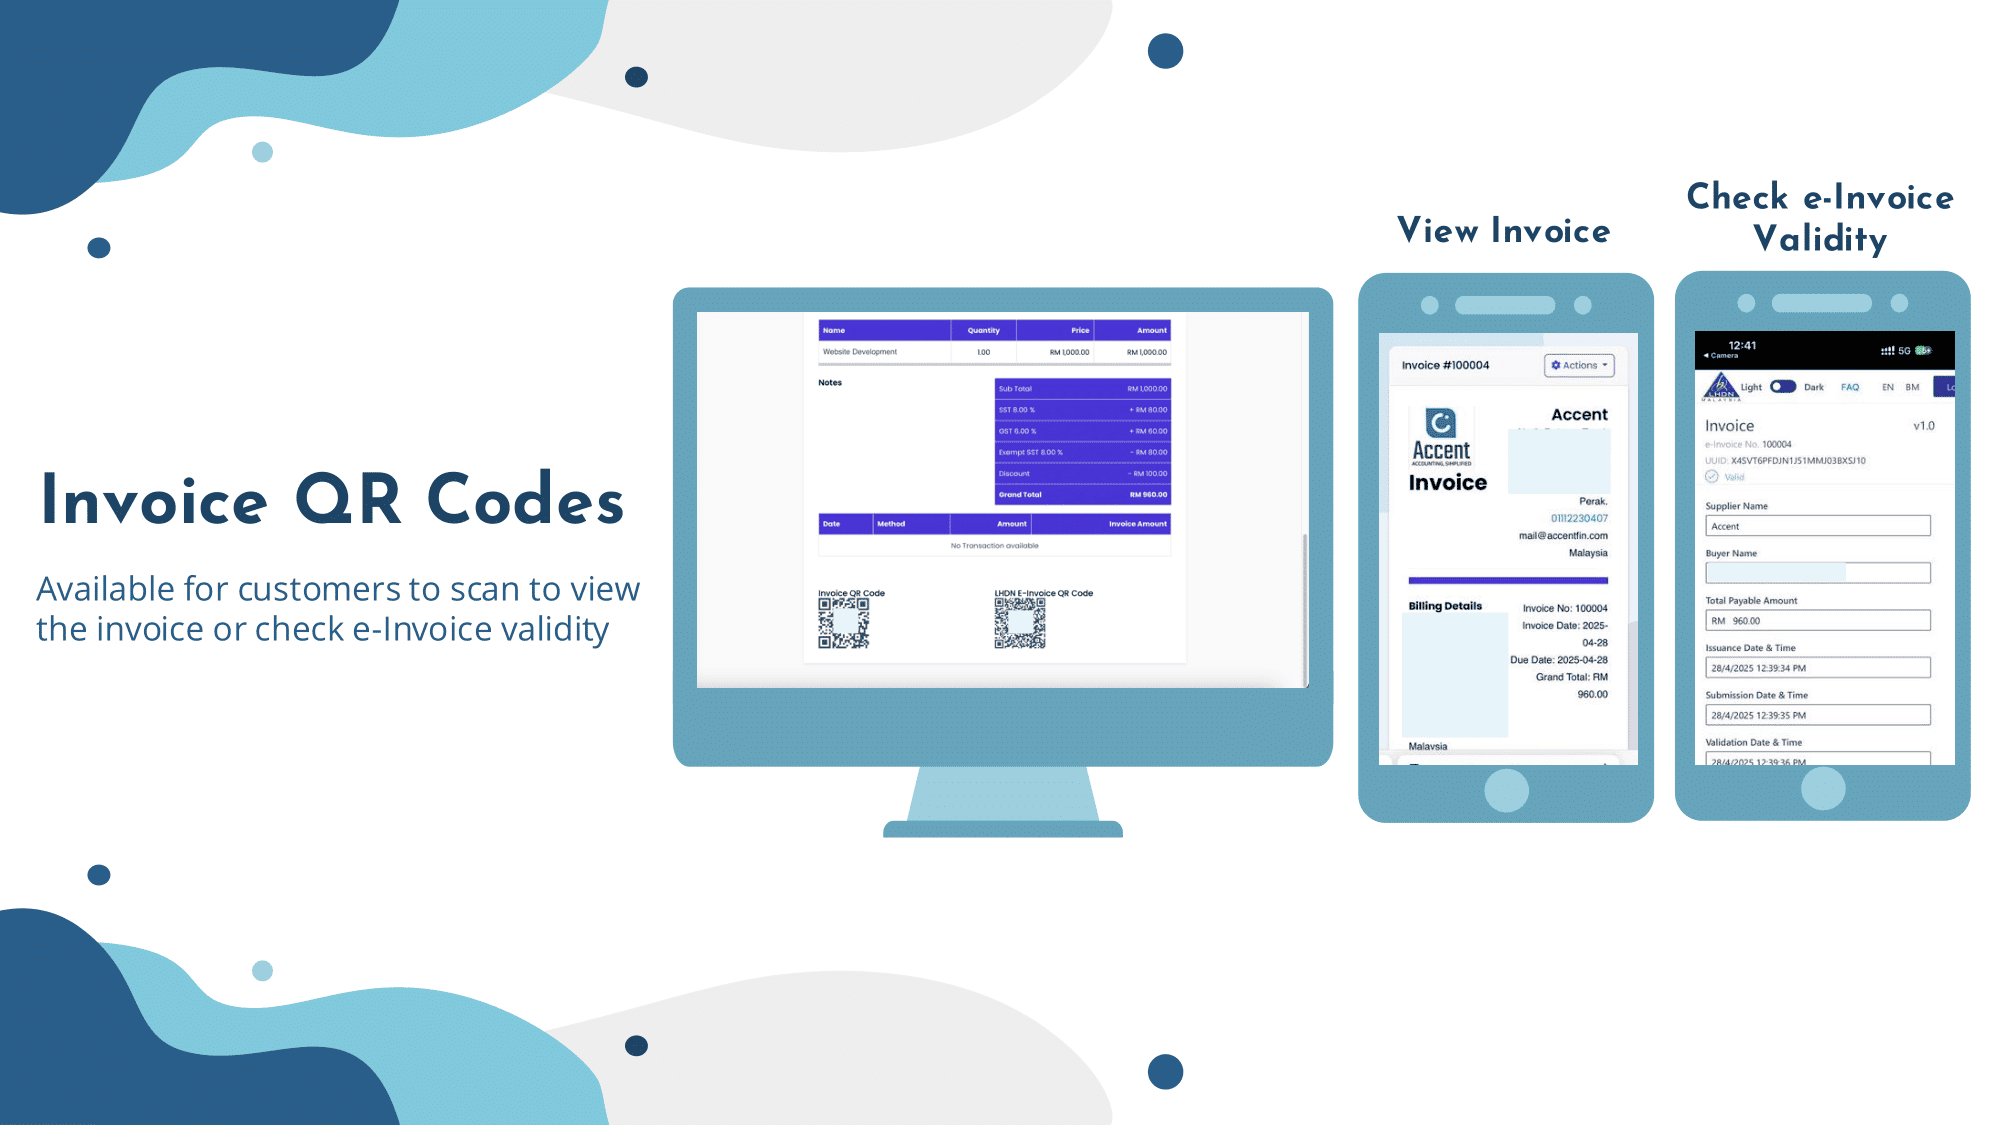
Question 1 : How to show e-Invoice QR in my invoice so that my customers know and can validate that the invoice I issued is accepted and acknowledged by LHDN?
1. At the page where you edit your invoice template, scroll down and look for a UI Element named E-invoice QR, drag and drop the element into the template and place it wherever you want.
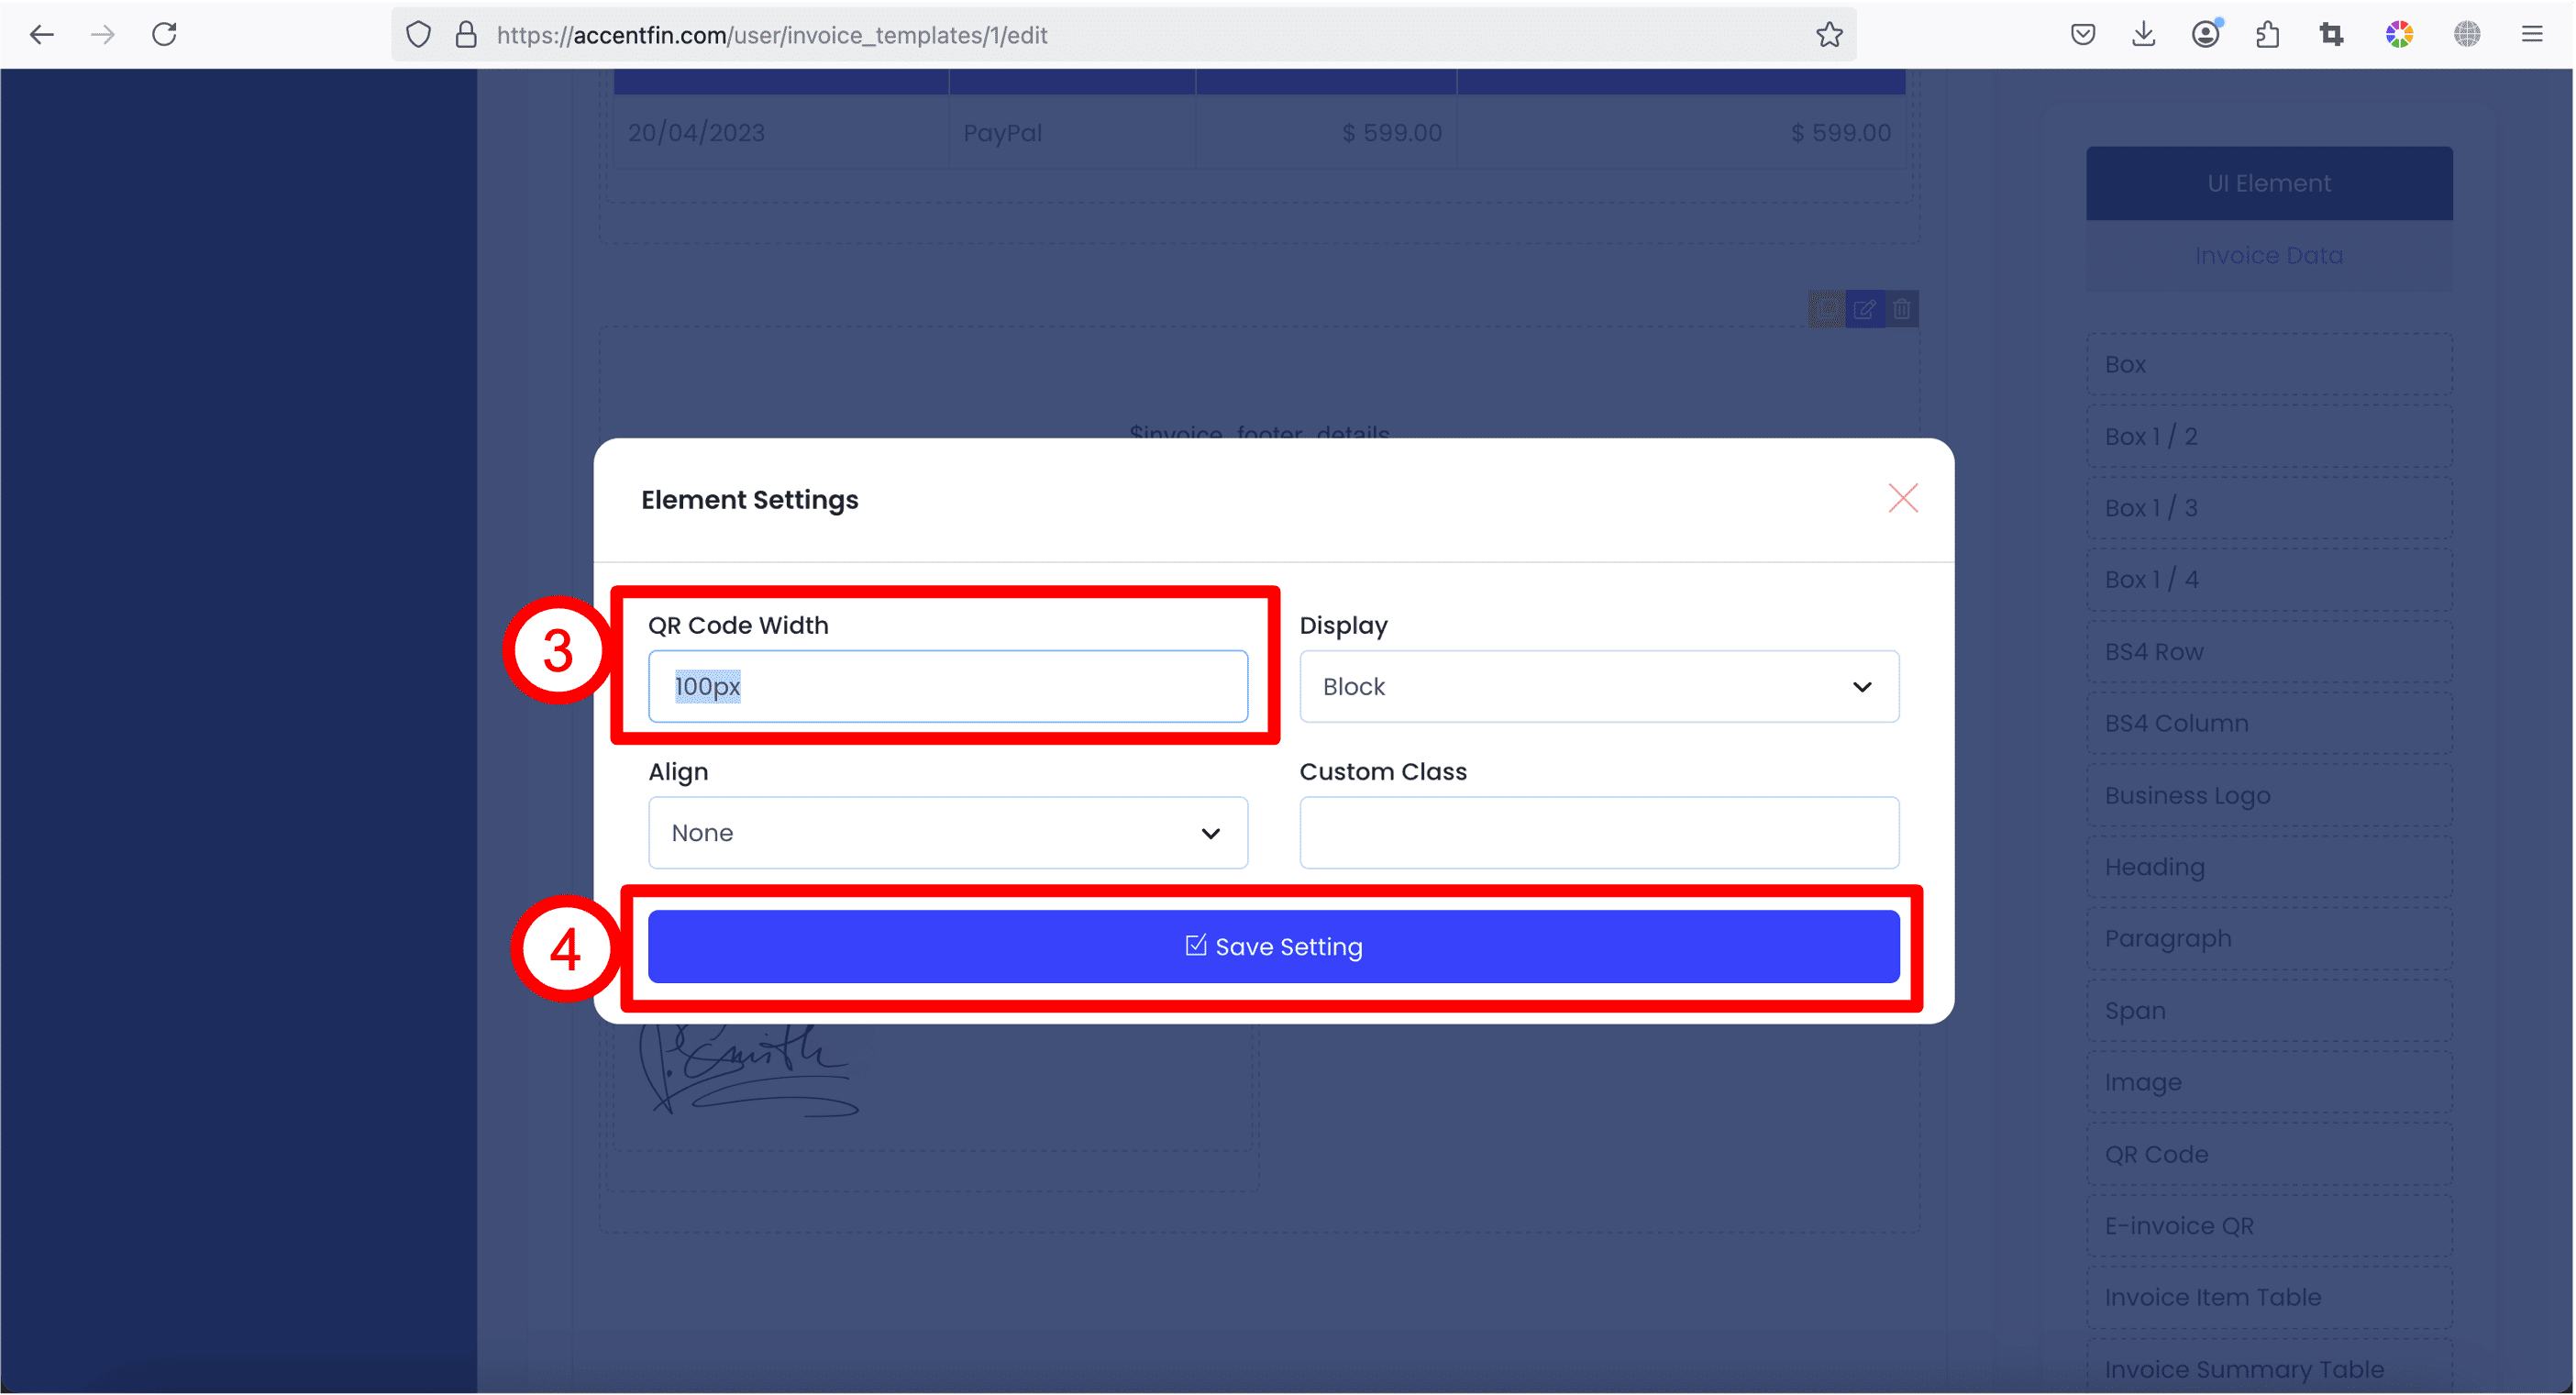
2. If you wish to make the e-Invoice QR bigger in your invoice, click on the blue color button to edit the element.
3. Change the number part of the QR Code width to a larger number (eg. 200px). If you wish to change the alignment of the QR Code, you can also select a different alignment from the dropdown Align.
4. Click Save Setting.
Question 2 : What is the difference between QR Code element and E-invoice QR element?
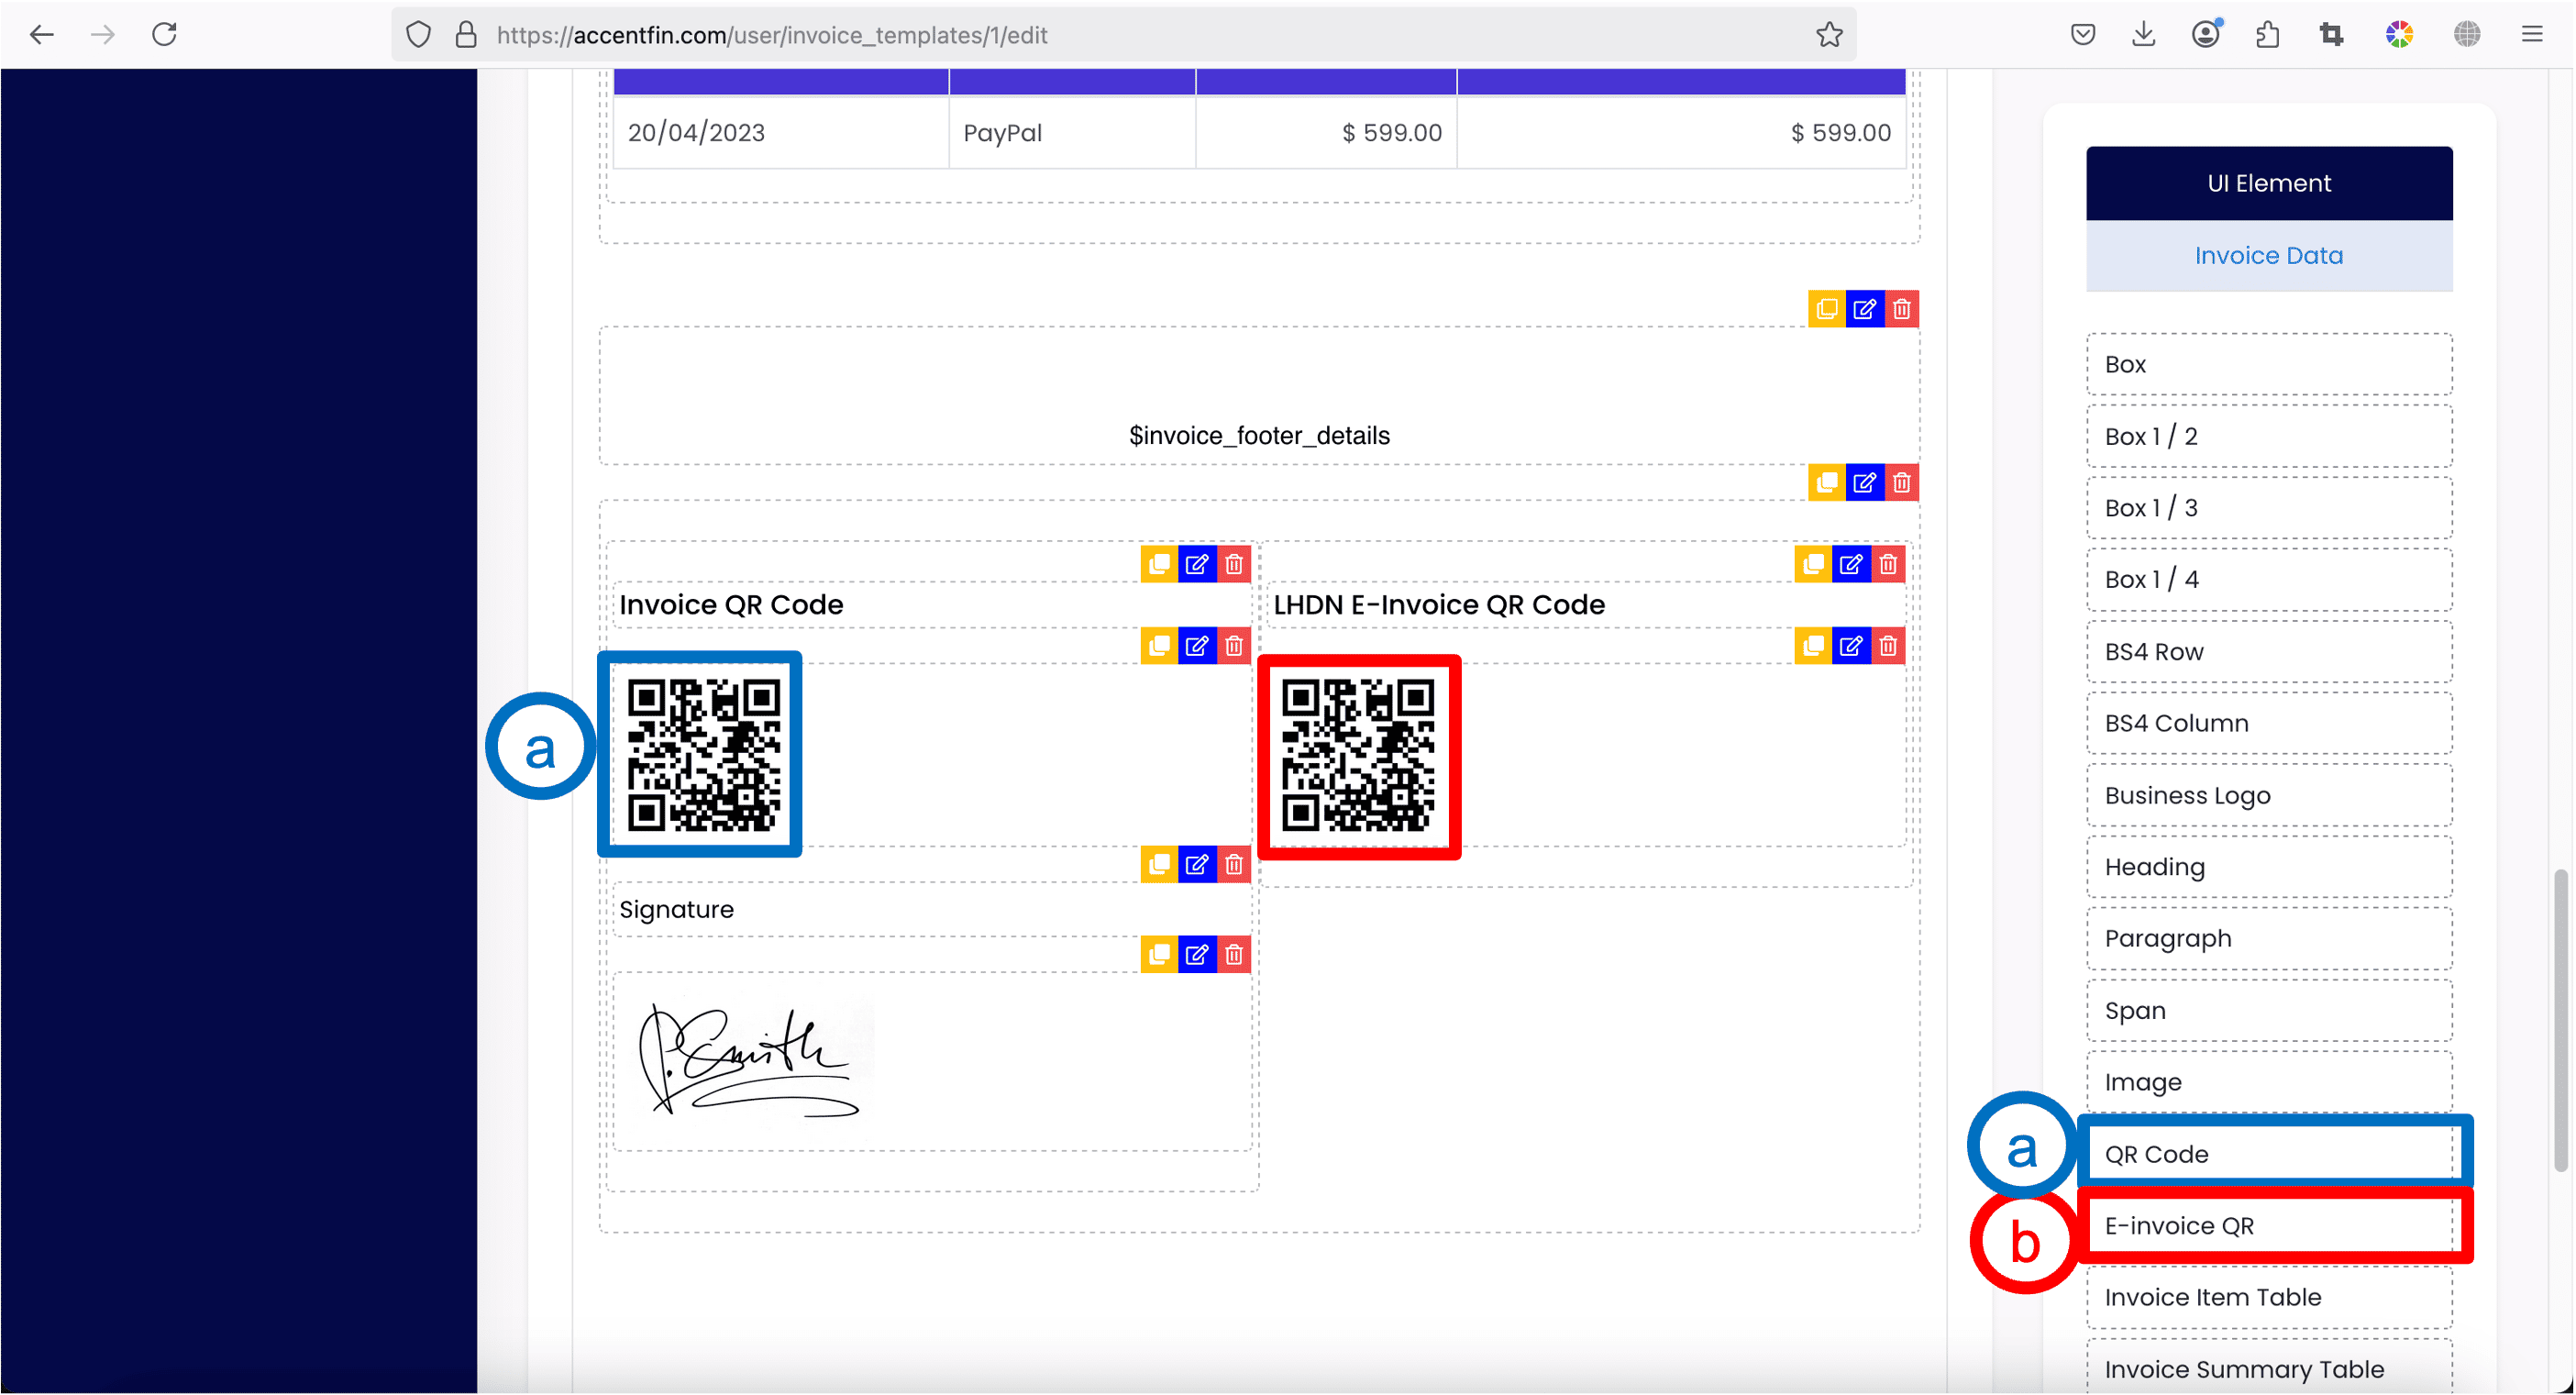
a. QR Code
This is a QR Code where you display in your invoice, and when your customer scans on this QR, it will be redirected to the web version of the invoice. Where on the web version of the invoice, user can click on Action button to pay for your invoice through online payment (if you have enabled Payment Gateway in Business Settings mentioned above).
b. E-invoice QR
This is the QR embedded on your invoice where your customers scan to verify that the invoice you issued to them is a valid e-Invoice accepted and acknowledged by LHDN.
Below shows the output of scanning two different QRs (a and b).
Comments (0)